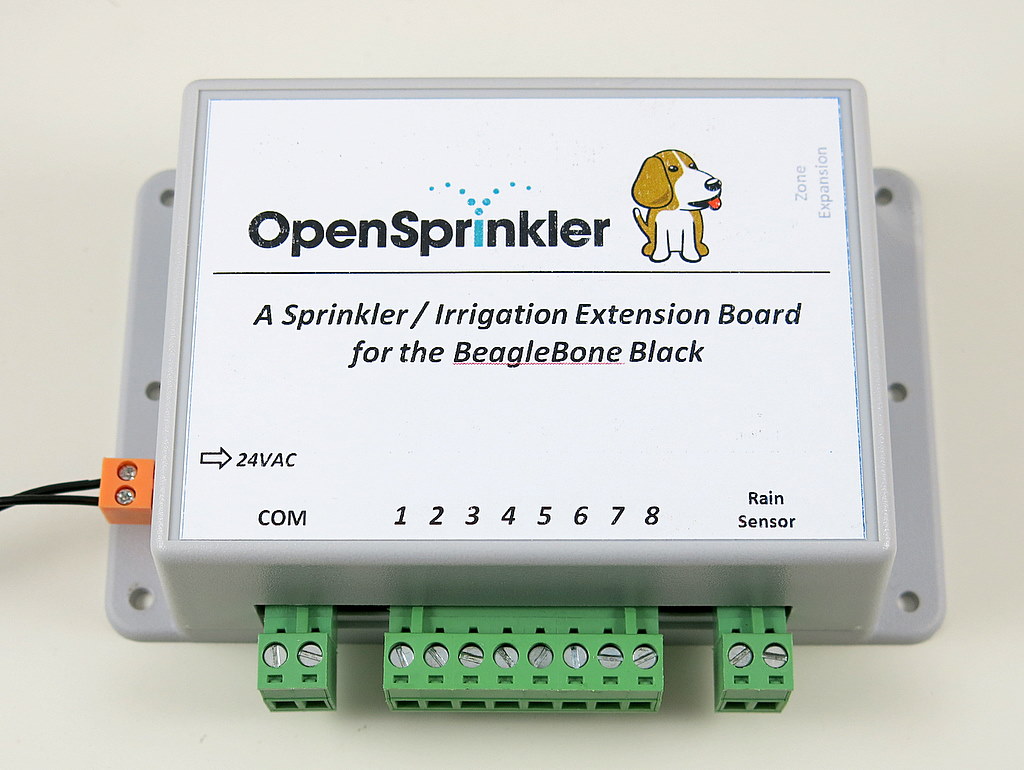
OpenSprinkler Beagle Online User Manual
Content
Hardware Setup
The OSBo package includes the following items:
- One assembled and tested OSBo board.
- Screw terminals.
- Support pillars and screws.
- Extra long male pin headers.
- Enclosure.
The following items are NOT included and should be purchased separately:
- BeagleBone Black.
- Sprinkler transformer (22∼28V AC).
- (Optional) nano-size USB WiFi dongle, such as this Edimax WiFi Adapter.
Power Supply. OSBo uses a standard 22∼28V AC sprinkler transformer. The current rating should be at least 500mA (12VA). Sprinkler transformers can be purchased online (search for sprinkler transformer or 24V AC transformer), or at local home improvement stores. You can also buy a cheap off-the-shelf sprinkler timer which usually comes with a transformer.
OSBo can supply 5V 750mA power to the BeagleBone Black, so you don’t need to use a separate USB power adapter. To reduce the chance of damage due to power surge, please use a surge protector.
Step 1: Test Power Supply
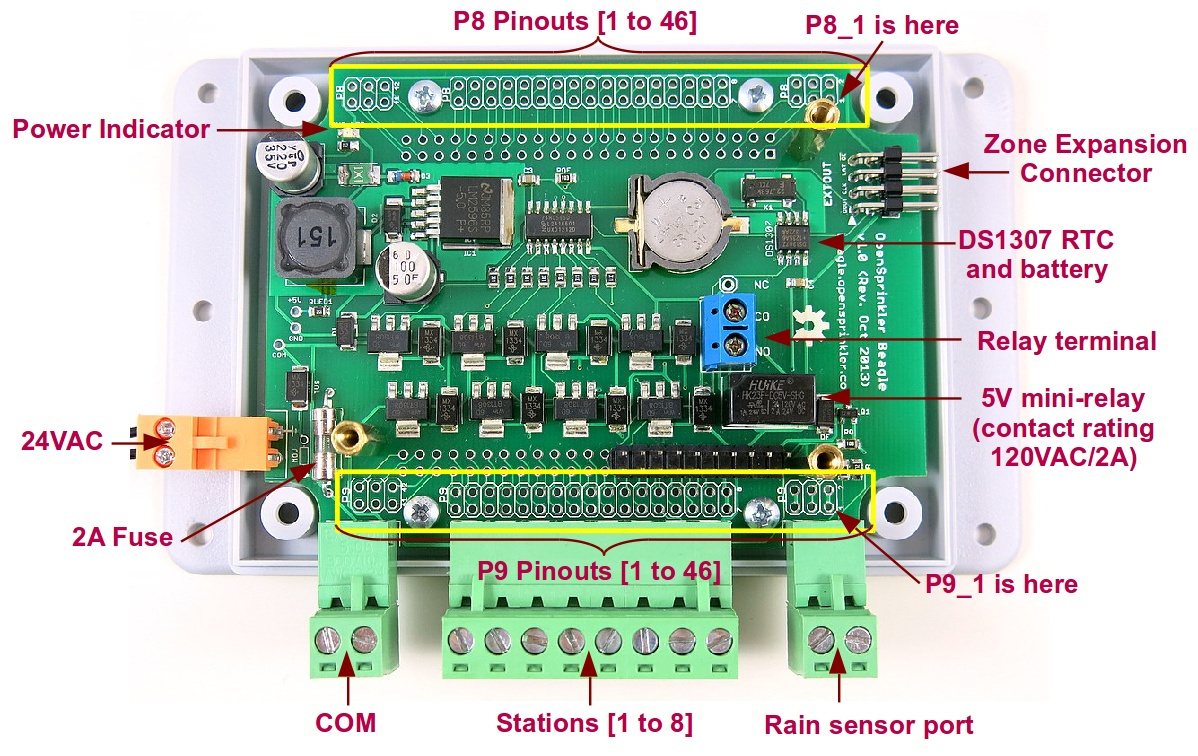
The first step is to test the OSBo power supply. Connect the two wires from your 24VAC transformer to the ORANGE screw terminal, and plug it into the 24VAC terminal port on the left side of the PCB. The orange terminal block has different pin spacing and color from the other terminal blocks, to prevent incorrect connection. The green LED on the board should light up, indicating that power is on.
Step 2: Attach BeagleBone Black to OSBo
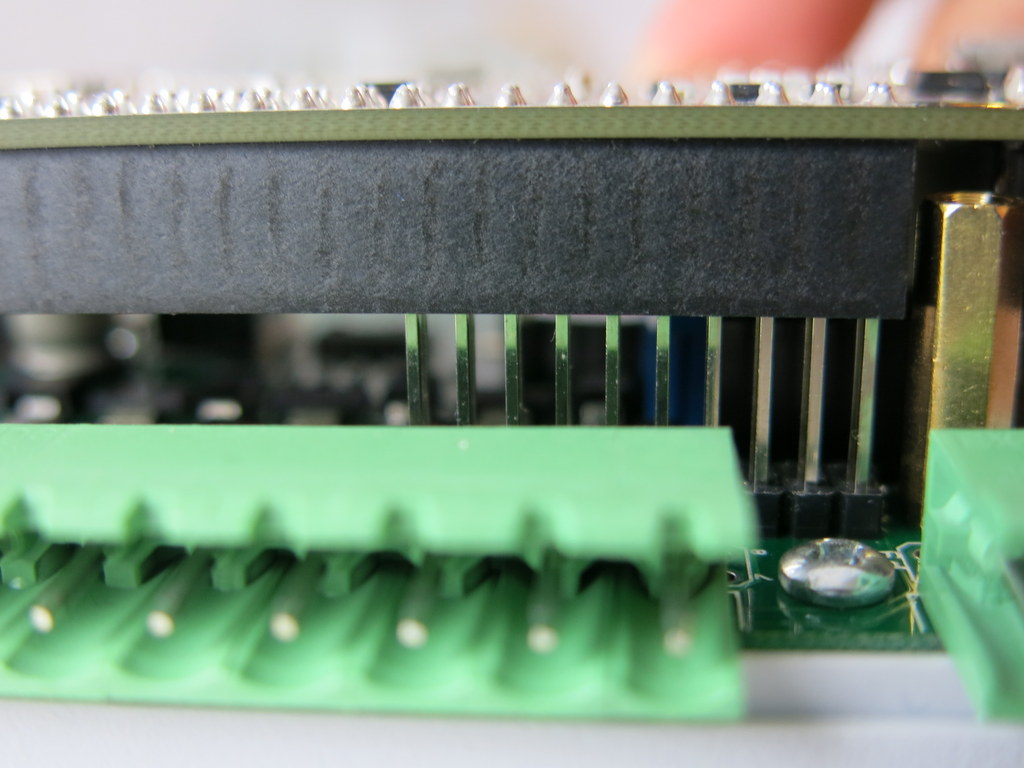
To proceed to the next step, unplug the 24VAC power for now. Grab your BeagleBone Black, face-down, orient it such that the USB port is on the left and Ethernet jack is on the right. Then align the first 2×10 pins on port P9 with the 2×10 male pin headers on OSBo. Carefully plug the BeagleBone Black into the pin headers, make sure no pin is left out or bent. See the picture on the left below.
Now check the three screw holes marked by the red arrows in the right picture below. Make sure they are aligned with the support pillars underneath. If they are misaligned, the pin headers are probably also misaligned, and you should redo the above step.
Important: DOUBLE CHECK and make sure the pins and screw holes are aligned well, otherwise you may risk damaging your BeagleBone Black when it’s powered on.
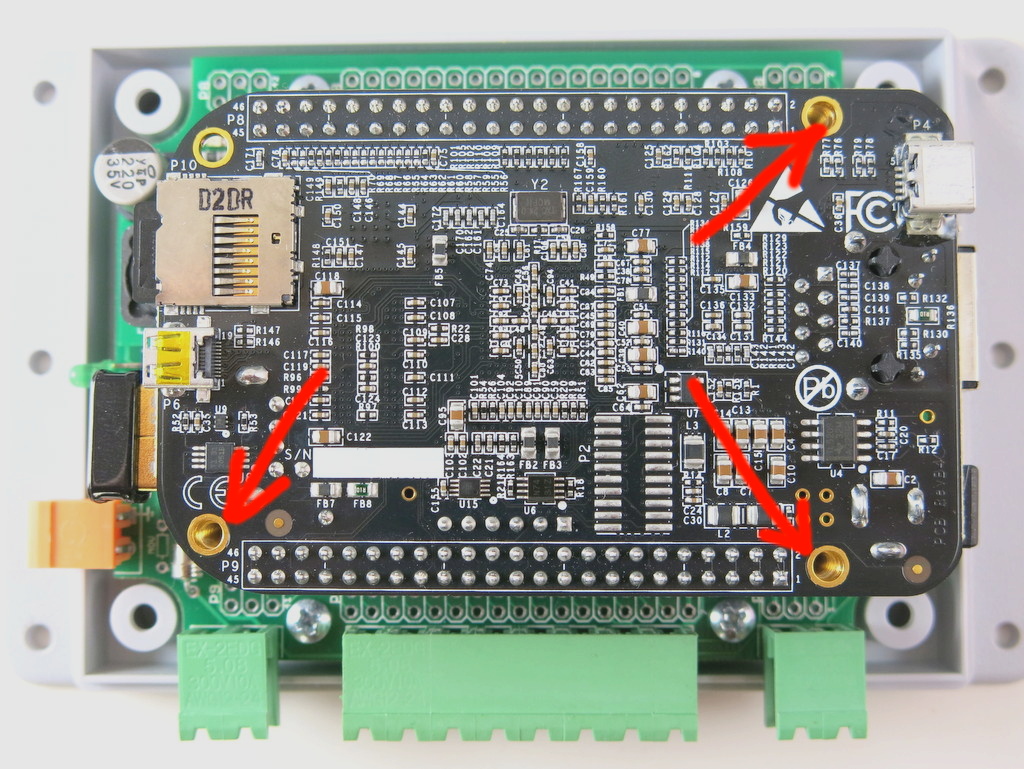
Secure the BeagleBone Black to the support pillars by using the M3 (3mm) screws. See the picture on the left below. Then secure the board to the enclosure’s bottom cover by using the four PCB screws. Finally install the front cover and tighten the case screws from the back of the bottom cover.

Step 3: Wire Sprinkler Valve
To connect sprinkler valves, use the COM (common) terminal and the individual station terminal (S1-S8). Specifically, a sprinkler valve has two wires. Connect one wire to the COM (Common) terminal (either one of the two ports), and the other wire to an individual station terminal (S1-S8). For multiple valves: one wire from each valve is combined together and that goes to the COM terminal, and the other wire of each valve goes to its corresponding station terminal.
Zone Expansion
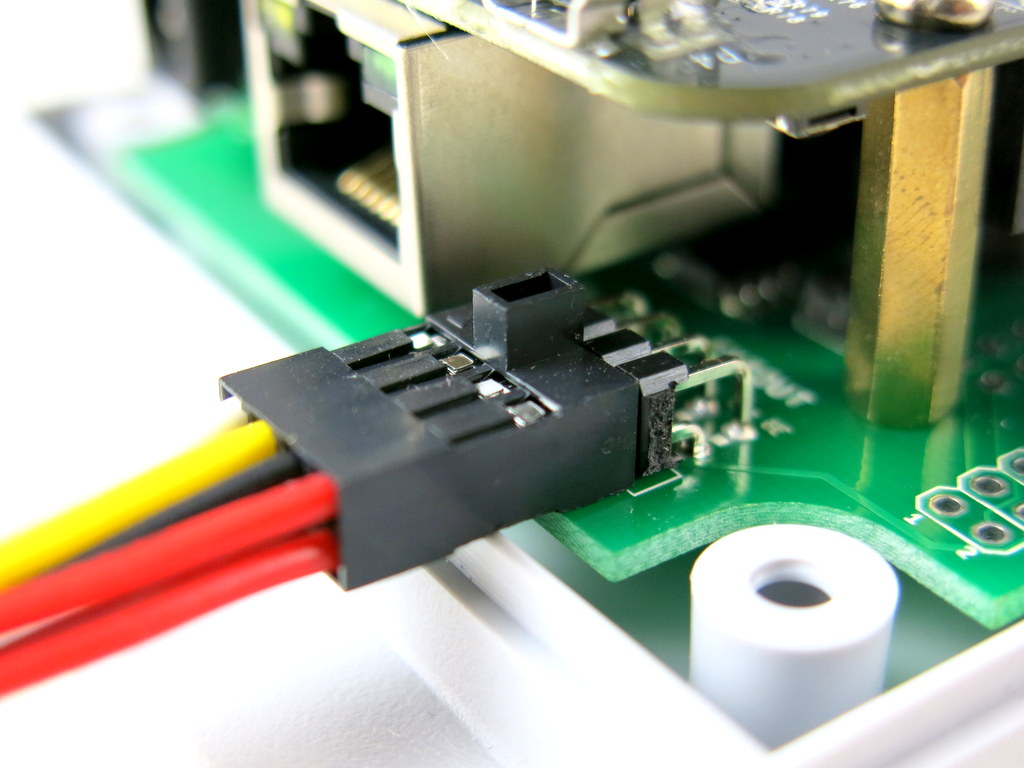
OSBo itself controls 8 stations, but there is a built-in shift register connector that allows it to be linked to OpenSprinkler zone expansion boards to enable more stations. There is no limit on how many stations it can link to.
To make the connection, use the 2×4 extension cable that comes with your zone expansion board to link the EXTOUT port of OSBo to the IN port on the expansion board. The cable has polarized connectors: each connector has a ‘bump’ on it, and there is only one way to plug them in — namely with the bump facing up. This prevents incorrect connections.
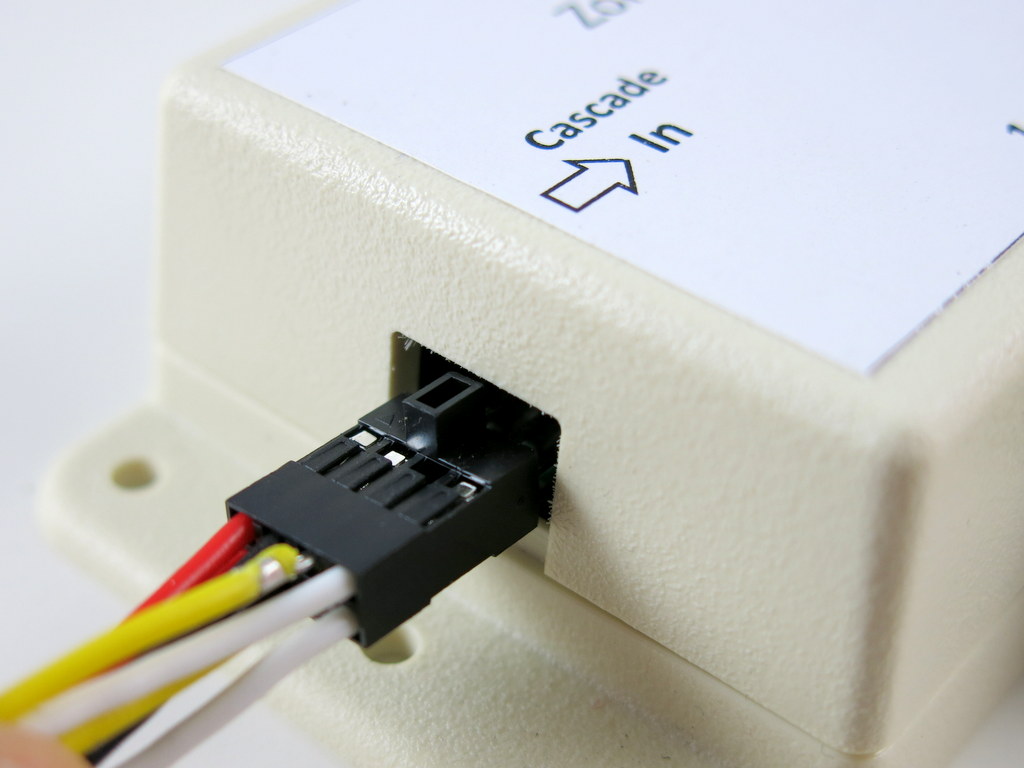
If you have multiple expansion boards, you can cascade them by following the expansion OUT -> IN links.
If you own previous versions of expansion boards which do not have polarized connectors, keep in mind that you should always use the cable that comes with your expansion board: For example, DO NOT apply the version 1.1 cable (i.e. with polarized connectors) to the original version of expansion board, because these cables are wired differently.
Software Setup
One of the biggest benefits of using embedded Linux like BeagleBone is that writing software is much more convenient, and it’s possible to introduce more advanced features like weather-based and learning-based control. You have the choice of your favorite programming language, and virtually unlimited program and data storage size.
OSBo Software Details
There are currently three demo programs (installed in the /home/ubuntu/demos folder of the pre-configured image) and one full-featured program for OSBo (installed in the /home/ubuntu/OSBo folder):
- selftest: a Python program that turns on each station for 10 seconds. It is useful for quickly testing solenoid connections.
- relaytest: in the same folder as selftest, toggles the on-board mini-relay at 1Hz, for testing relay actions.
- gcalendar: makes use of the Google calendar to schedule water programs. This program periodically polls a public Google calendar to check which stations are scheduled to be on at the current time. Each program is a calendar event and the title indicates the station name(s). Google calendar makes it easy to schedule complex recurring events, and it’s accessible on most devices.
- The full-featured OpenSprinkler interval_program (which runs on microcontroller-based OpenSprinklers) has now been ported to OSBo, thanks to the generous contributions by Dan Kimberling. On the pre-configured SD card, this is the default program set to run on start-up, and it’s accessible at http://x.x.x.x:8080 where x.x.x.x is the IP address of your BeagleBone Black. The user instructions are the same with the OpenSprinkler 1.8.3 Firmware User Manual.
Before running each demo, please read the instructions attached in the README.txt under each specific program folder. For example, for the Google calendar demo, you need to provide a public Google Calendar ID. Also keep in mind that since the programs requires direct access of GPIOs, you will need to run them either as root or use sudo.
If you are looking to write your own firmware, you can use the three demo programs as a starting point, which provide important functions such as shiftOut for interfacing with sprinkler valves. The GPIO pin assignments are:
- P9_11: shift register data pin (DAT).
- P9_12: shift register latch pin (LAT).
- P9_13: shift register clock (CLK).
- P9_14: shift register output enable pin (NOR).
- P9_15: rain sensor pin (active low).
- P9_16: mini relay (active high).
- P9_19: DS1307 SCL.
- P9_20: DS1307 SDA.
Please feel free to make comments / suggestions on the Rayshobby forum. I also encourage you to take advantage of the Rayshobby User Wiki for adding user-contributed content. Thanks!
