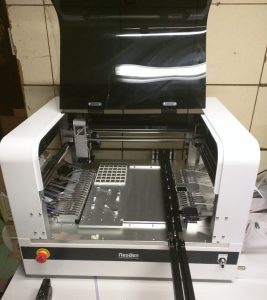
A few years ago I purchased a NeoDen TM-240A desktop pick and place machine, and wrote two blog posts about it. It was one of the most popular desktop pick and place machines on the market back then, and has served me well for the past three years. It does small boards pretty well, but without a computer vision system, it requires a fair amount of manual placement of fine-pitched components; and it only has a fixed set of 27 feeders, which are not entirely sufficient for me.
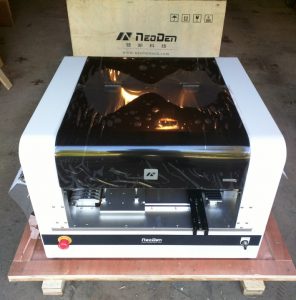
Recently NeoDen released a new model called NeoDen 4 — it’s their first desktop model that has built-in computer vision system. The vision-based alignment makes it possible to place fine-pitched components with minimal manual work. It has four pick and place heads, which means if can simultaneously pick up to four components at a time. It can fit a lot more feeders, and can handle a variety of component types, including matrix tray components, and any special components that you can lay out in a 3D printed tray. It has a vibration feeder for components in tube packaging. Although I rarely use tube packaging, one notable exception is the CH340G USB-serial chip, which is used in almost all my products, and so far it only comes in tubes. On top of these exciting new features, the machine I ordered comes with a PCB conveyor belt that can automatically feed PCBs into the system. This is really convenient for starting a pick and place job.
Well, a picture is worth a thousand words, and a video is worth a thousand pictures! Without further ado, here is my video review of this machine:
So far I am pretty happy with the machine. Pricing-wise, it’s surely more expensive than TM-240A, but not significantly. I paid around 9K in total, including DHL shipping and all the feeders (for TM-240A I paid 5.5K). It’s not all perfect so you’ve got to learn the quirks. For example, I learned that the component height is often quite important — without providing the proper component height, the placing may give you a lot of troubles. Also, for components that need better placement accuracy, reducing the placing speed (say, to 50%) helps a lot to improve the accuracy and reliability.
Overall the machine operation is fairly intuitive, and it works in a predictable manner, much better than some of the comparable products I’ve seen on the market. No matter how powerful the machine is, you can’t afford to spend forever learning how to use it. It took me just two days of looking through the user manual, video tutorials, and doing my own trial and error to learn to successfully produce the first board using this machine. I would say it’s pretty good.
Disclaimer
I am not associated with NeoDen in any way. I am just a standard user. Please do NOT contact me for purchasing or sales questions. Go to their company website (either their USA distributor http://neodenusa.com/ or the Chinese headquarter www.neodentech.com) for details.
EagleCAD ULP Script
One difficulty I had initially was how to export a PCB design to a format acceptable by the machine. Without this I would have to manually locate the x-y coordinates of each component using the down-facing camera, which would be a huge pain. The user manual and video tutorial had no descriptions about the format of the spreadsheet. After banging my head on the wall for a while, I found one example spreadsheet somewhere in the flash drive that came with the machine, and that seems to work. Then I went ahead and modified an existing EagleCAD script (designed for TM-240A) to match the example spreadsheet. The script can be downloaded from the link below. Please take a look at the README file as it explains how to use the script.
Thanks for the Neoden 4 review, best I have seen. Really hope you can go over the software demonstration once reverted back to English. Will you be making any more videos, maybe to show what you have learned to correct misaligned components? Very interested on learning curve for non-experienced users.
I will probably do another video soon that goes through the setup process in more details.
Thanks, I’m thinking of getting one of these myself in the next 6-12 months your review helped me out in what to expect.
Seriously, the best review of this PnP!!! I want buy this machine but in Argentina is not so simple. Time ago I used a TWS PnP in a company where I work. This time I want to place a production line for my designs and to offer the assembly service to others. Your review definitely confirm me that this machine is the correct machine. I wait your second review and thanks for all what you did!!!
Thank you for taking the time to do this fantastic review!
Thanks for the nice video. What is the maximum height of a component. Is it possible to place connectors and electolytic capacitors ?
I am pretty sure it’s 5mm. I have a couple of really-tall components that won’t fit, so I ended up just making a 3D printed grid frame for these components, and lay them out as a matrix-tray so that they can be picked as matrix-tray elements instead of feeder elements.
Hello,
Thank you for this review. Very interesting.
Would you be nice and post an update after 3 months of service ?
Have a good day.
/fred
Hi, it was so nice this review. But im having a lot of problems with the references of the PCB and coordinates when i’m import a CVS into the machine. I wonder if you can help me.
Hope you can, have a nice day.
The fiducial recognition seems to work pretty reliably for me. For importing coordinates, I use the EagleCAD script that I wrote (and it’s available in the github repository). Basically you need to identify the first component on the PC board, and use the machine to find out the xy coordinates, then use my script to export component positions to CSV. This will make sure the first component xy matches the machine’s xy. If your PCB is not designed in EagleCAD, you can write your own script to do this conversion. In the worst case you can just use the spreadsheet to do the conversion.
Hello,
I could ask, I have a problem with your ulp script, eagle writes me syntax error (6). I use V7.2.0
Thank You very much!
I use version 7.7. If you see the error message, it should tell you which line of the code is throwing the error, and you can change that line as needed.
Hello Ray
While watching your video review, I noticed the whole software interface being in Chinese. As I imagnine my office collegues won’t accept any chinese training lessons beforehand… Is the software switchable to plain english?
Yes, they come in English by default. I switched to Chinese but then found to switch back to English I have to request a passcode and I haven’t done that yet.
Hi
I bought a Neoden 4 and I use Eagle for all my boards. Could you send me some information on how you got the bottom side to work? I modified the ulp to what I thought was right but it doesn’t work right.
To clarify my previous comment. The component C100 is the first component with location X= 99.77, Y = 58.64. After running the ulp for the bottom and using the C100 X/Y location it gives C100 at location X= 99.77 Y = 58.64. The next component c101 should be at machine location 115.02 for x and 73.85 for y. After I run the ulp I get C101 at 84.59 for X and 74.01 for Y.
I think you need to mirror the coordinates for the bottom boards. The reason is that when you export from Eagle it will export the X-Y that’s in the same coordinate system as the top side. But when you place the components obviously the bottom side has to face up, so the coordinates need to be mirrored first.