Feed on
Posts
Comments

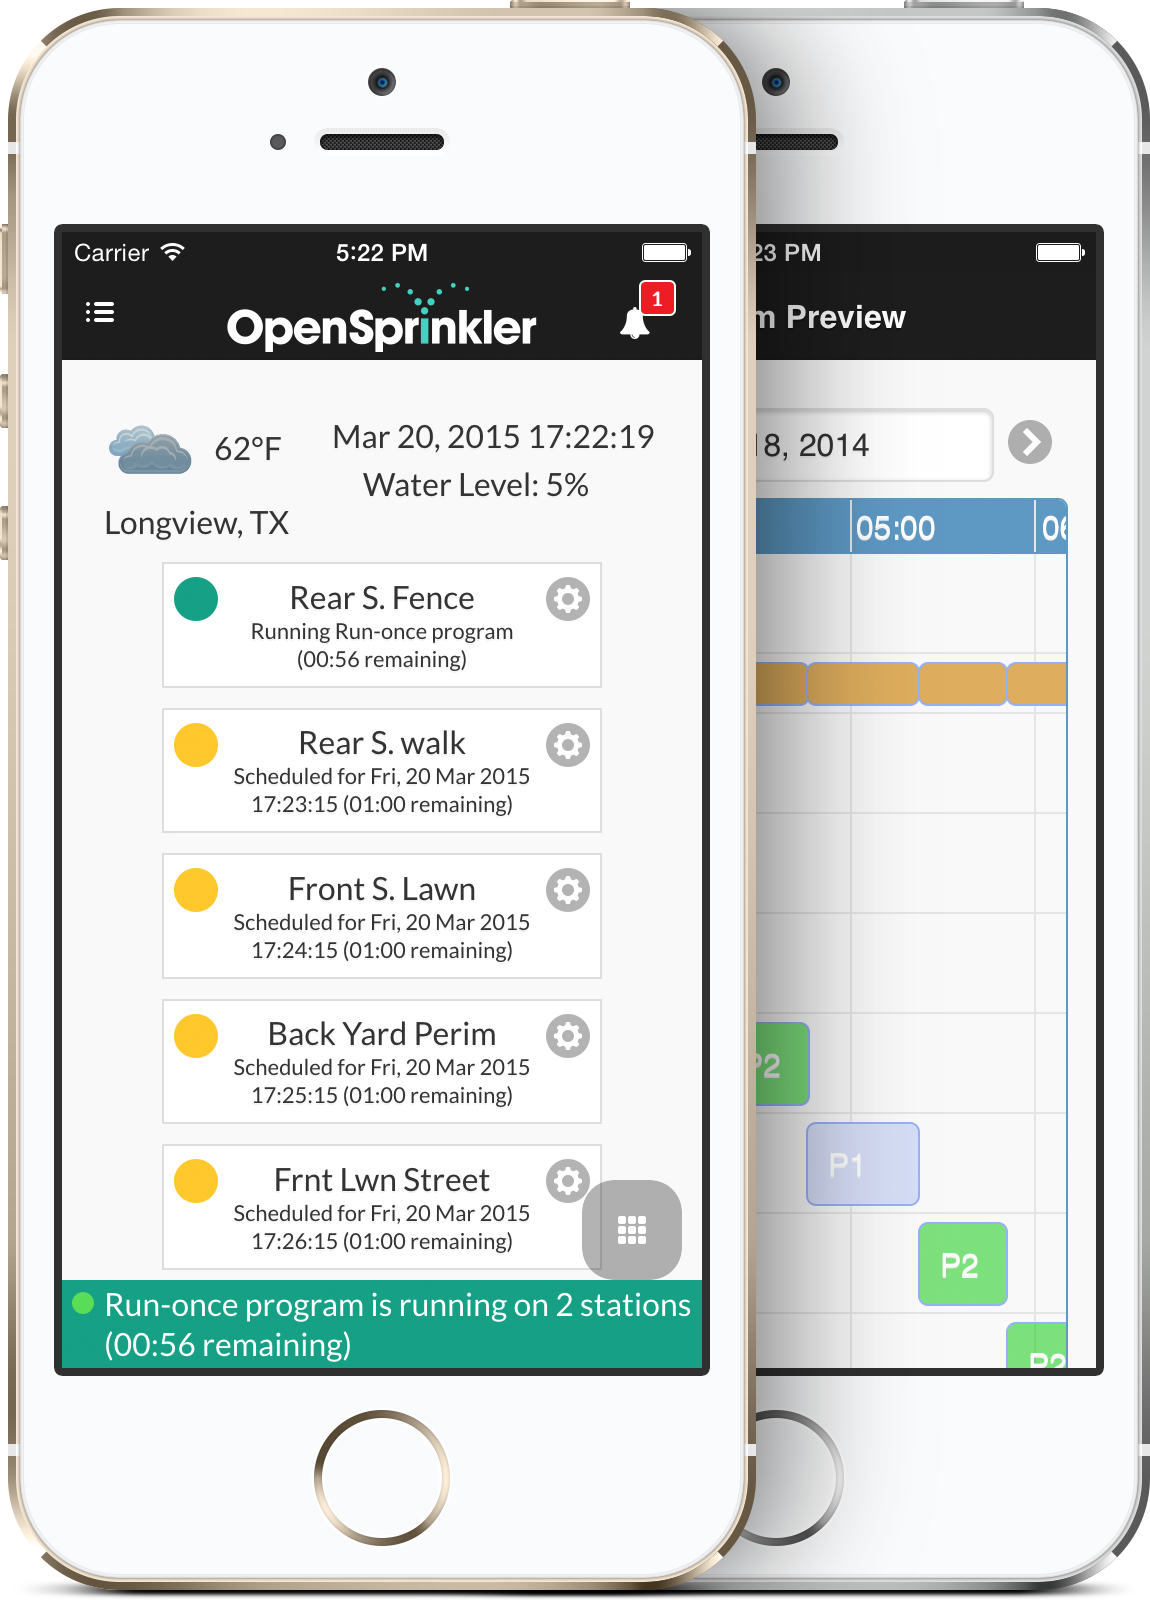
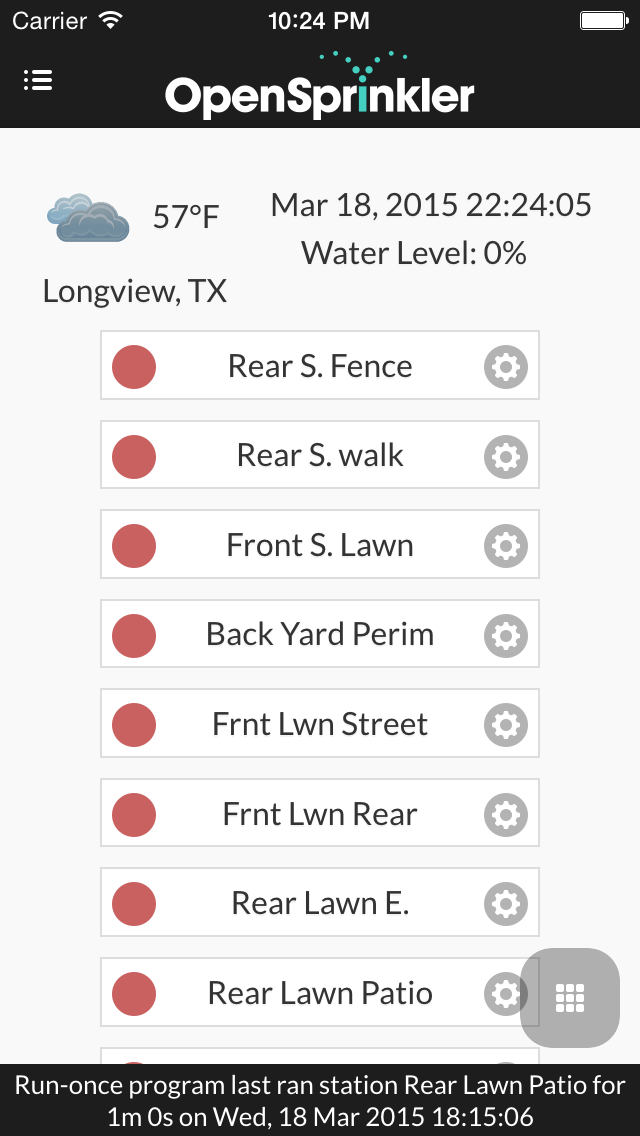
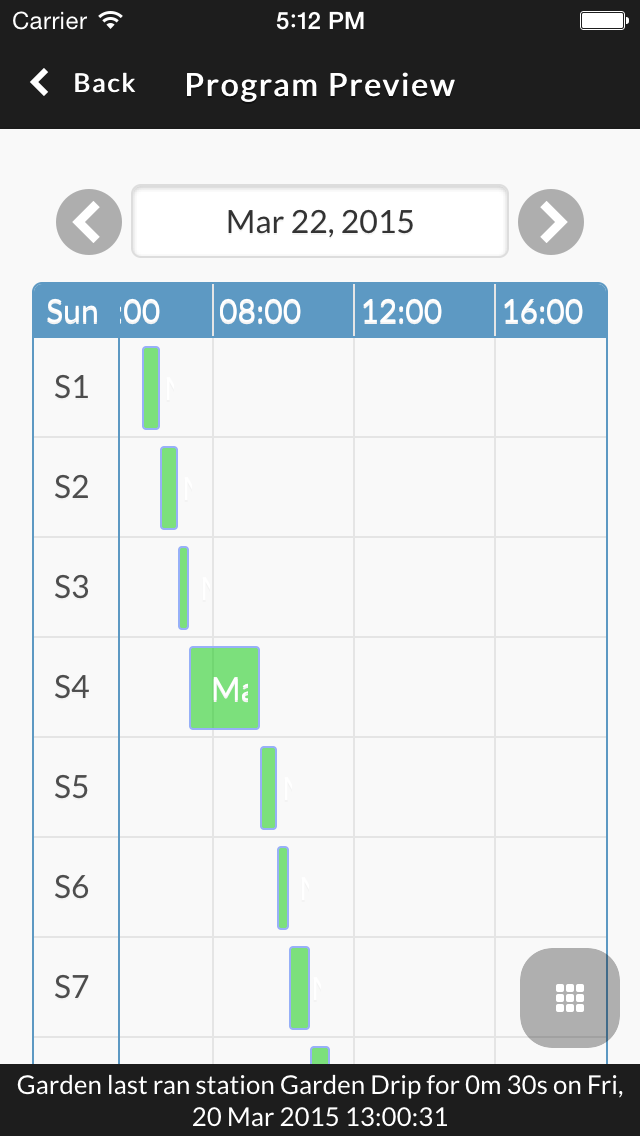
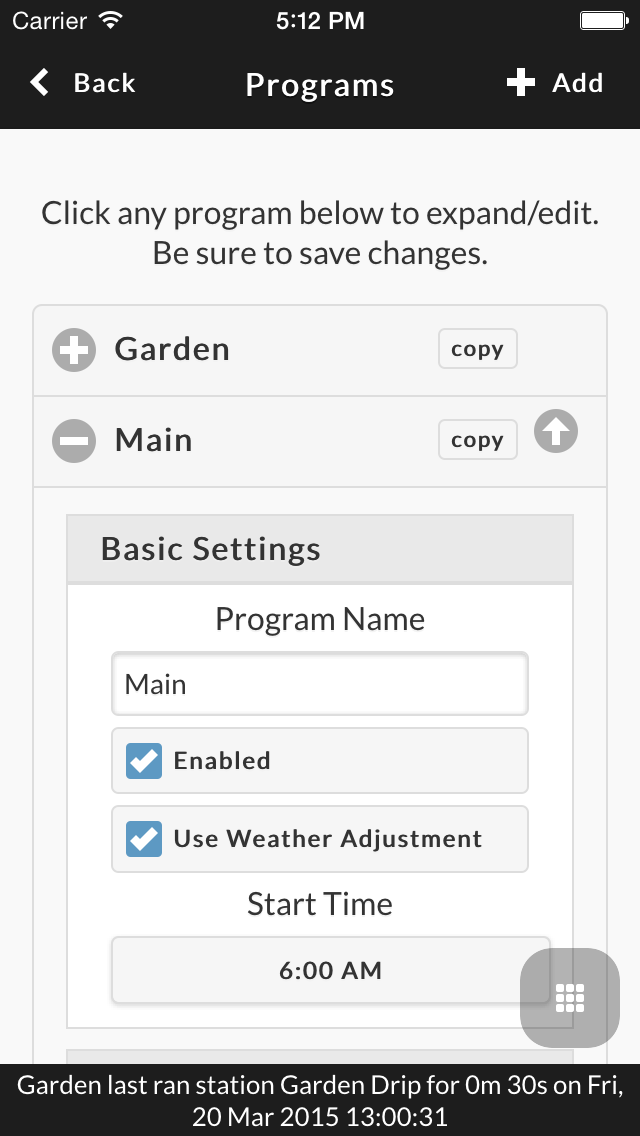
I am very excited to announce that the OpenSprinkler native mobile app is now available on all platforms (iOS, Android, Windows Mobile). A big shout-out to Samer Albahra for his diligent and absolutely fantastic work in developing this app!

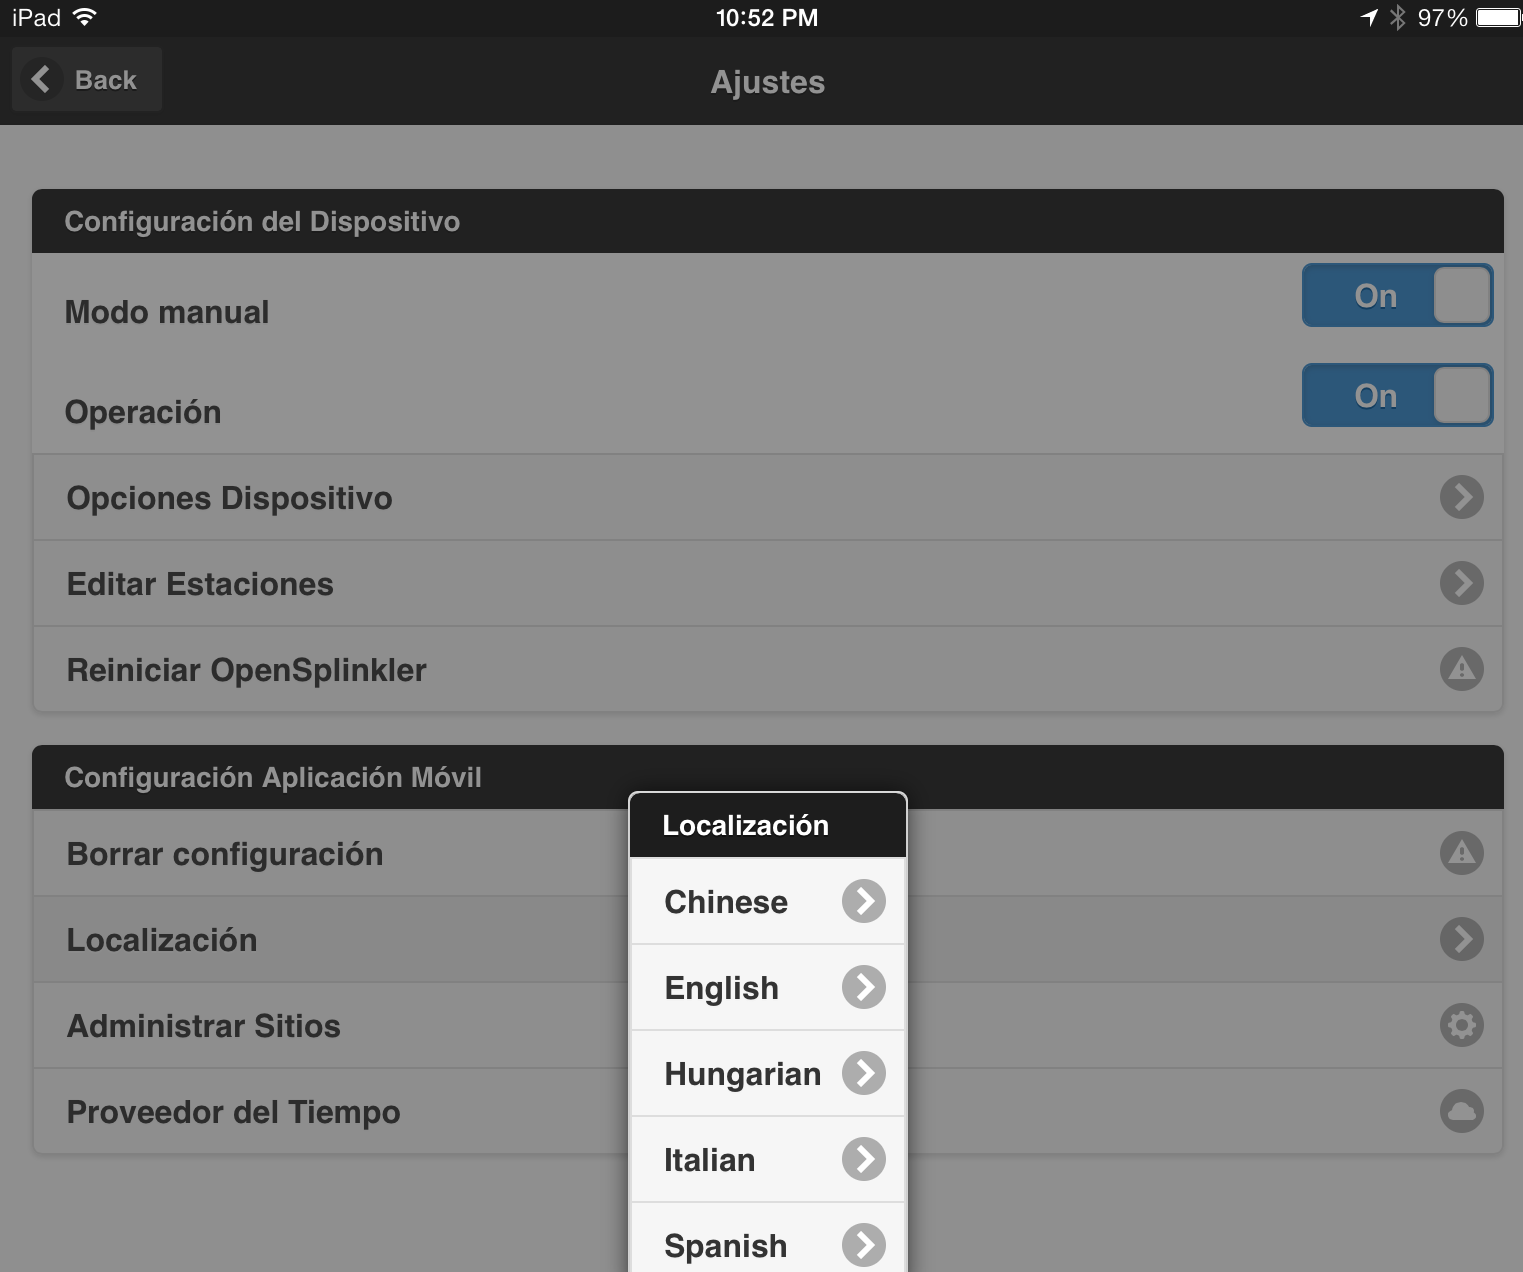
Different from the previous OpenSprinkler web app, the native app can be installed as a standard app on your mobile device. This not only enables some new features (such as automatic scanning device, multi-language support) right away, but opens doors for more exciting features in the future, such as push notification and local storage (e.g. representing each station with a photo icon). The app is free, so go ahead and give it a try right now!
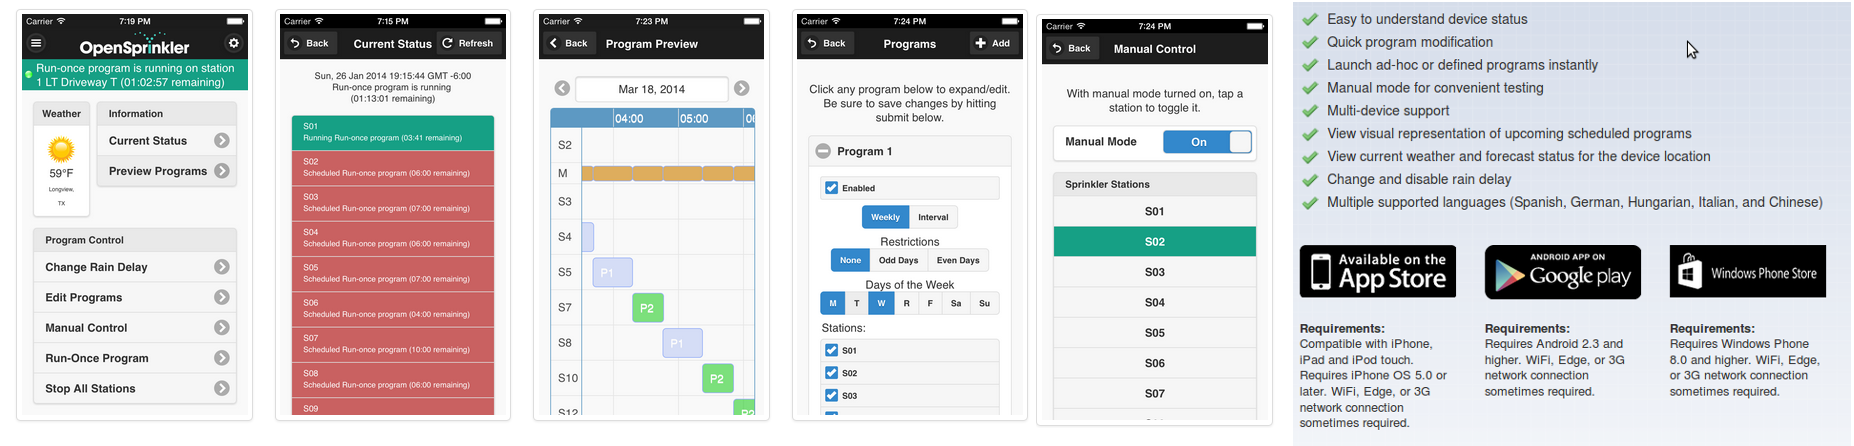
os_nativeapp_ui

Requirements:

Let me briely go through the requirements for using the app:

  • Hardware: to use the app you need to have either an OpenSprinkler (v2.0 and above), or OpenSprinkler Pi (OSPi, any version), or OpenSprinkler Beagle (OSBo, any version). Even if you don’t have the hardware, you can set up a software simulation (Dan’s interval_program) on RPi or BeagleBone to try out the firmware and app. OpenSprinkler hardware v1.x is currently not supported. Sorry!
  • Firmware: the app requires OpenSprinkler firmware 2.0.4. If you don’t have this version, please follow the firmware update instructions to upgrade your firmware.
  • App Installation: search for ‘opensprinkler’ in iOS App Store, Android Play Store, or Windows Phone Store, and you should be able to find and install the app.
    • If you like the app, please give a +1 to show your appreciation of Samer’s work!
  • Port Forwarding (optional): unlike the previous web app, you don’t need to set up port forwarding any more if you are accessing the controller within your home network. However, if you want to access the controller outside of your home network (say, when you are traveling), you still need to set up port forwarding on your router. This requires knowing your OpenSprinkler’s IP address and port number (default is 80). Please refer to your router’s user instructions. You can also use dynamic DNS service (such as dyn.com, freeDNS etc.) to set up an easy-to-remember DNS name for your router. Most routers support dynamic DNS service as well.

NOTE to keep in mind: the app provides an alternative front end to the OpenSprinkler controller. The default front end, which is the controller’s webpage (accessed by typing in the controller’s IP in a browser), is still available and functioning. Any operation you apply through the app will also be reflected in the default front end.

Features:

The app has a number of notable new features:

  • Scan For Device: on first-use of the app, you need to input information about your OpenSprinkler device, normally the IP address and device password. Samer found a very clever way to quickly scan the local network and automatically find your OpenSprinkler device. This saves your work of having to find the IP address yourself.
  • Multi-Device Support: the app supports multiple device configurations. This is very useful if you have multiple OpenSprinklers and want to access each individual within the same app.
  • Multi-Language Support: this is another exciting new feature — the app provides language localization. There are currently six supported languages: English, Spanish, Hungarian, German, Italian, and Chinese. Big thank-you to Balazs for starting this feature and Samer for continued development. The translations are mostly provided by the users — for those who have contributed: thank you!
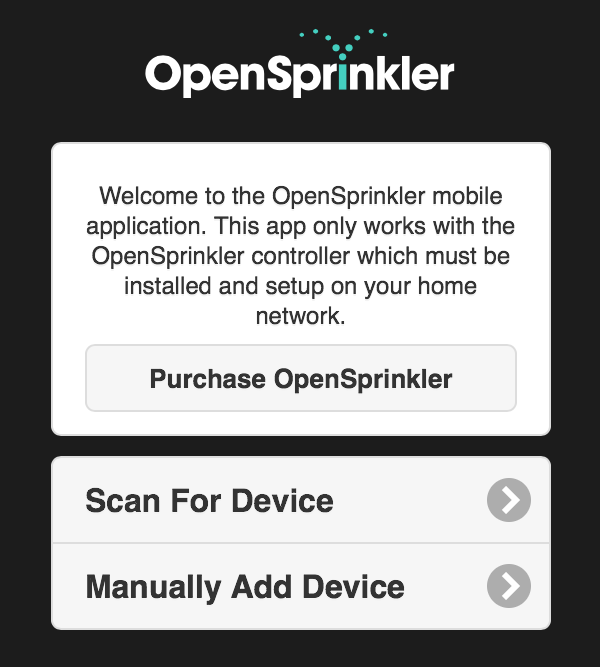
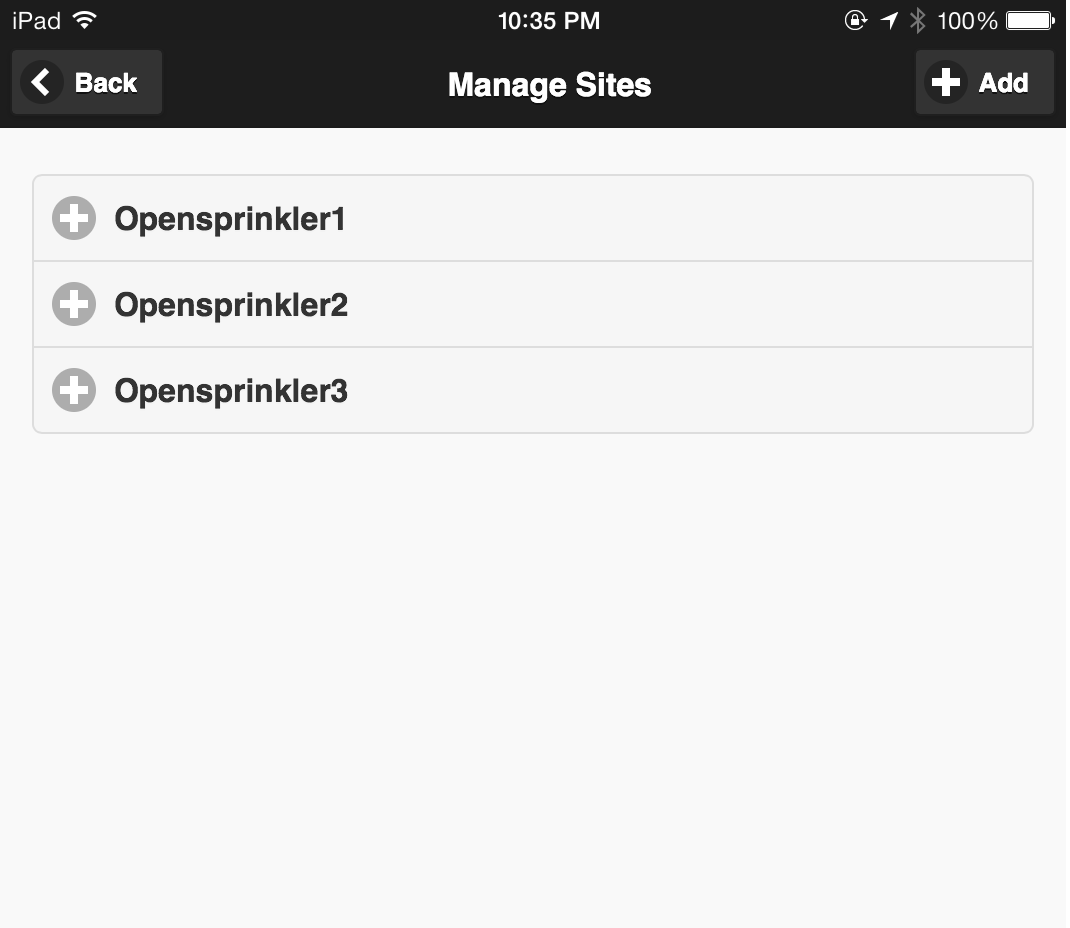
os_nativeapp_scanos_nativeapp_multios_nativeapp_language

These are just some of the highlights I would like to bring to your attention. There are plenty of other features that really make the app stand out, such as automatic count-down timer, easy editing of station names and programs, intuitive program preview, instant launch of any existing program (not just the run-once program), import/export configurations. You’ve got to try it out yourself to find out.

To find out additional details, please go to Samer’s website. Discussions of ongoing development are available at the Rayshobby Forum. Samer is continuously supporting the app development. Please kindly leave your comments and suggestions, either in the comments section below, or on the forum. Thanks!
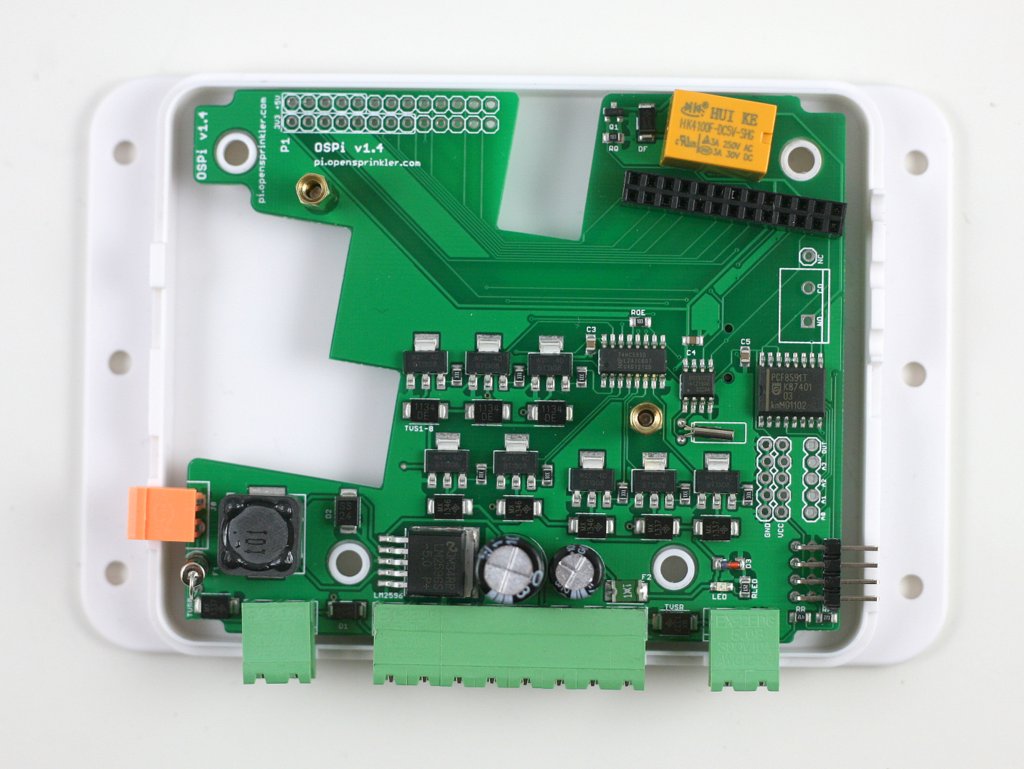
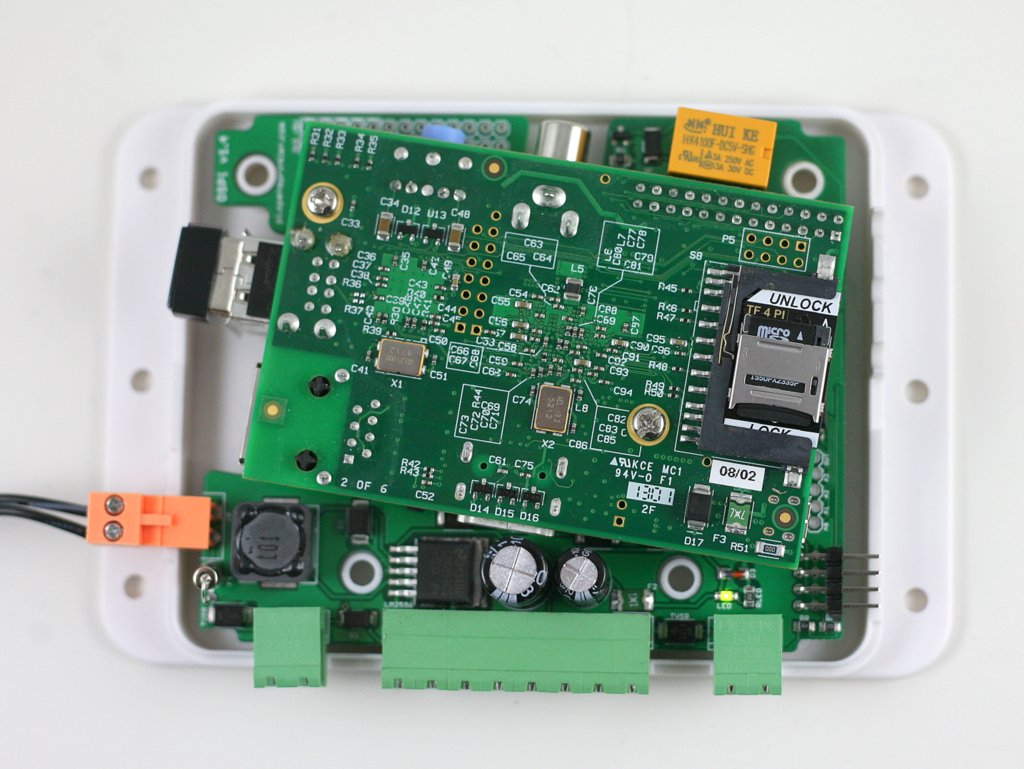
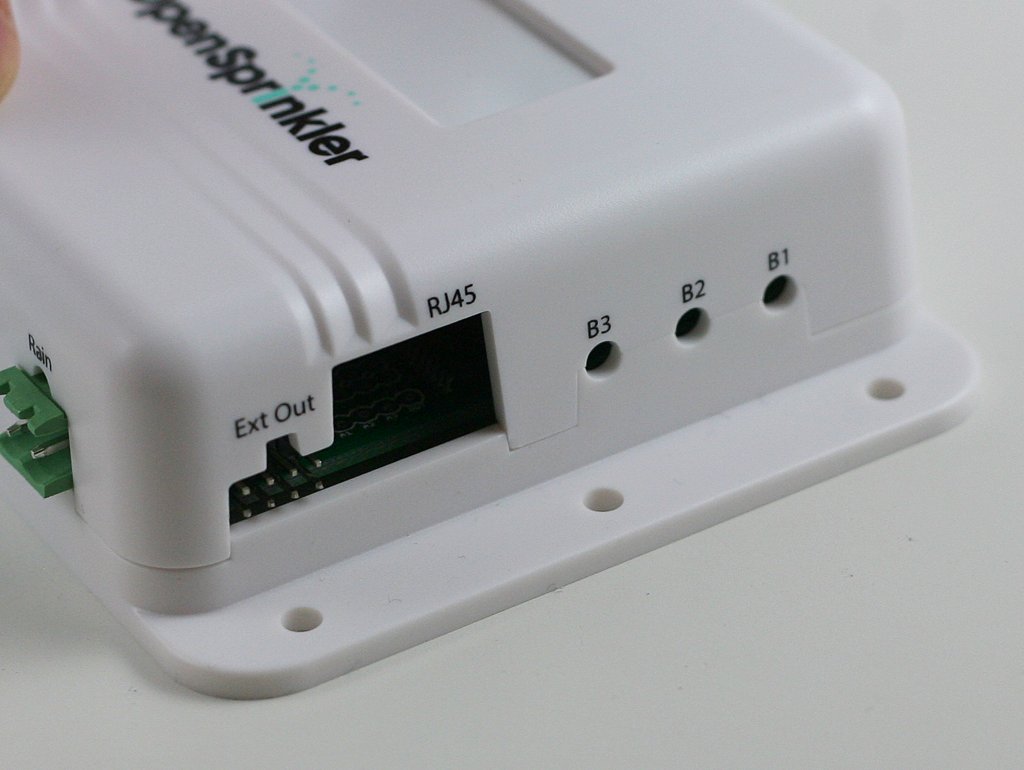
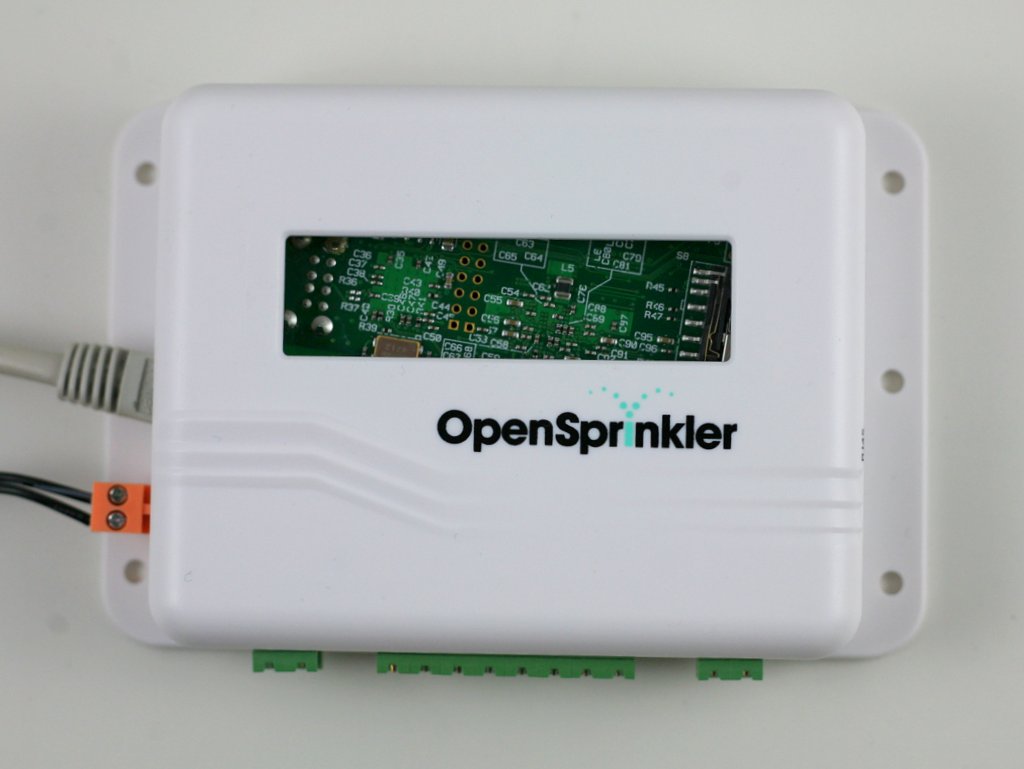
Curious what the next version of OpenSprinkler Pi (OSPi) is going to look like? Here is a sneakpeak preview of version 1.4:

IMG_3118IMG_3125

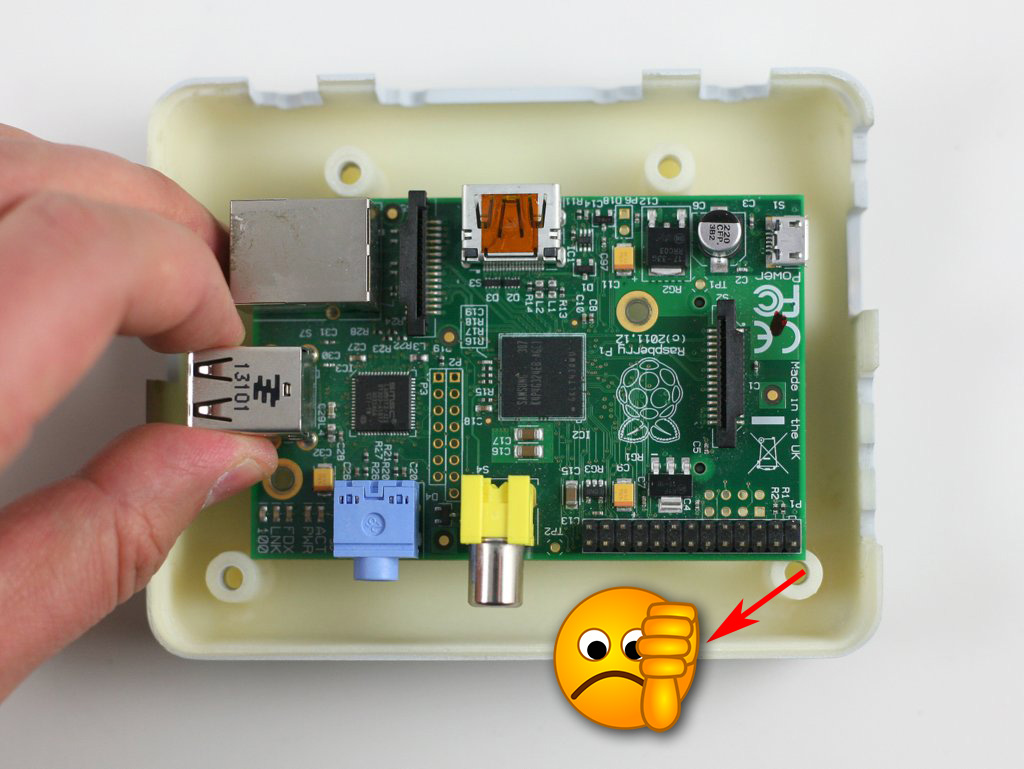
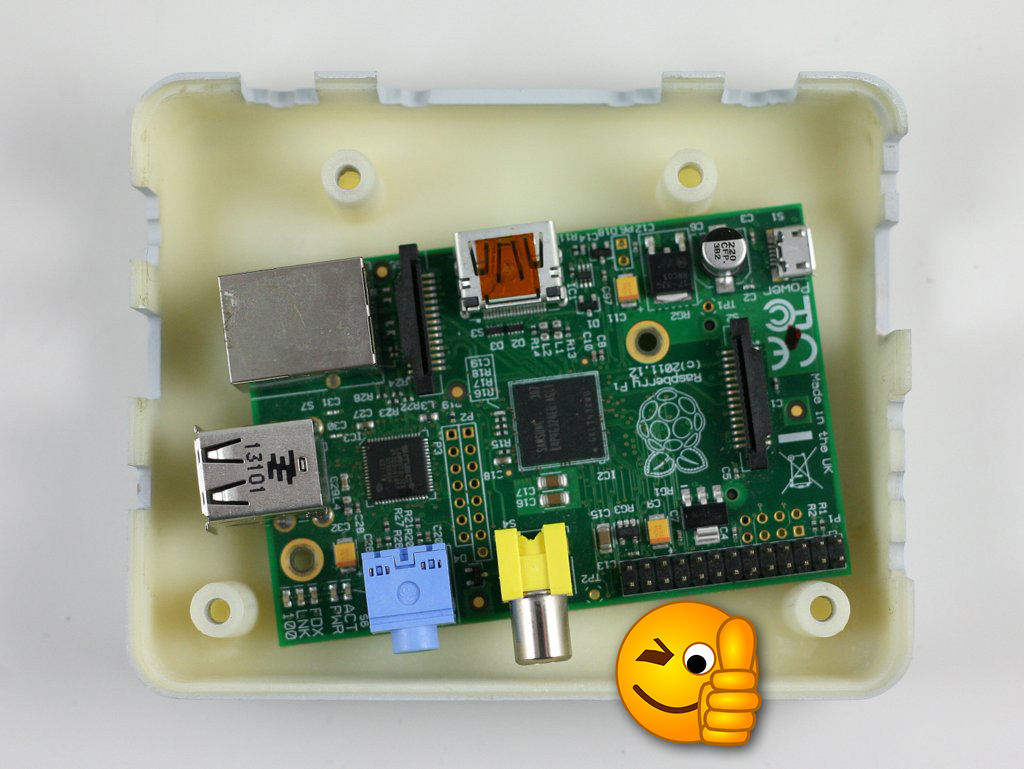
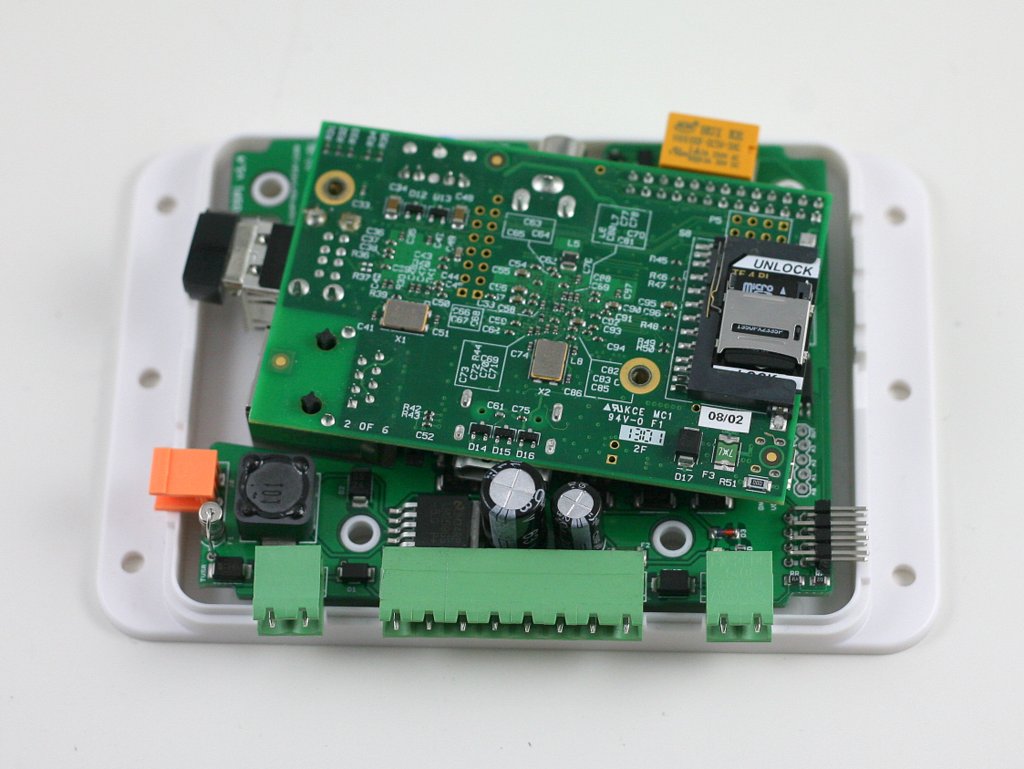
Wait a minute, what is this strange looking board?! And the Pi is installed at an angle? What’s happening here? Well, the new design is all centered around one simple goal: to fit OSPi and RPi into the existing OpenSprinkler injection-molded enclosure. There are many good reasons to do so. The first is cost reduction: the current OSPi uses the Serpac WM032 enclosure with custom cutouts. This is quite expensive to make. On the other hand, the microcontroller-based OpenSprinkler already has an injection-molded enclosure (and I paid a good amount of money for the mold!), so it makes sense to consolidate the design to use the same enclosure. This will bring down the cost quite a bit. Using the same enclosure also gives both products a consistent look. In fact, in the near future OpenSprinkler Beagle will also adopt the same enclosure, and hence all three will have the same exterior look.

Design Story

The ‘why’ part is easy to explain. But the ‘how’ part proves to a non-trivial engineering challenge. When I was first fiddling with the idea I didn’t think it was at all possible. After all, the injection-molded enclosure was made before OSPi came into place, naturally it was not designed with RPi in mind. It turns out that, due to the positions of the support pillars, the enclosure is just a little bit too narrow to fit RPi at a straight angle. Ouch! But after staring at it for a while like a geometric puzzle, I was delighted to find out that if you rotate RPi by 3 to 4 degrees, it fits perfectly! This gave me inspiration to further develop the idea. It also explains why the Pi has to be installed at an angle, as the picture at the top shows.

IMG_3132IMG_3133

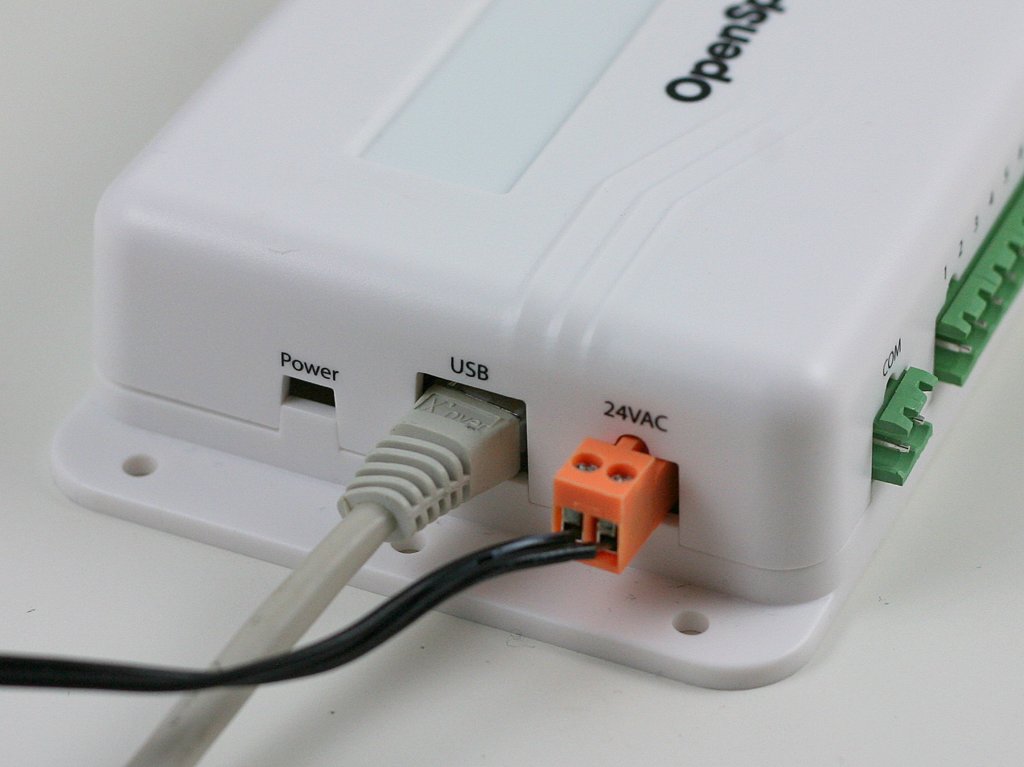
In fact, by carefully positioning the Pi, the Ethernet cable can also fit, albeit through the USB cutout instead of the RJ45 cutout. It’s a bit tricky to figure out the position precisely, but I am glad that after two rounds of prototypes I finally got it right 🙂

IMG_3129IMG_3130

Of course since OSPi doesn’t have buttons and LCD, some of the cutouts are useless. I am not completely sure what to do with the LCD cutout. If I leave it alone, it looks quite ugly (see picture on the left below). So my temporary solution is to just put a sticky label at the back, thus covering the big empty hole (see picture on the right below). Eventually I think it’s best to put some graphic design here. I am undecided what to put here. It shouldn’t be the OpenSprinkler logo as the enclosure already has a printed logo. If you have suggestions, please leave them in the comments section. I would greatly appreciate it!

IMG_3127IMG_3128

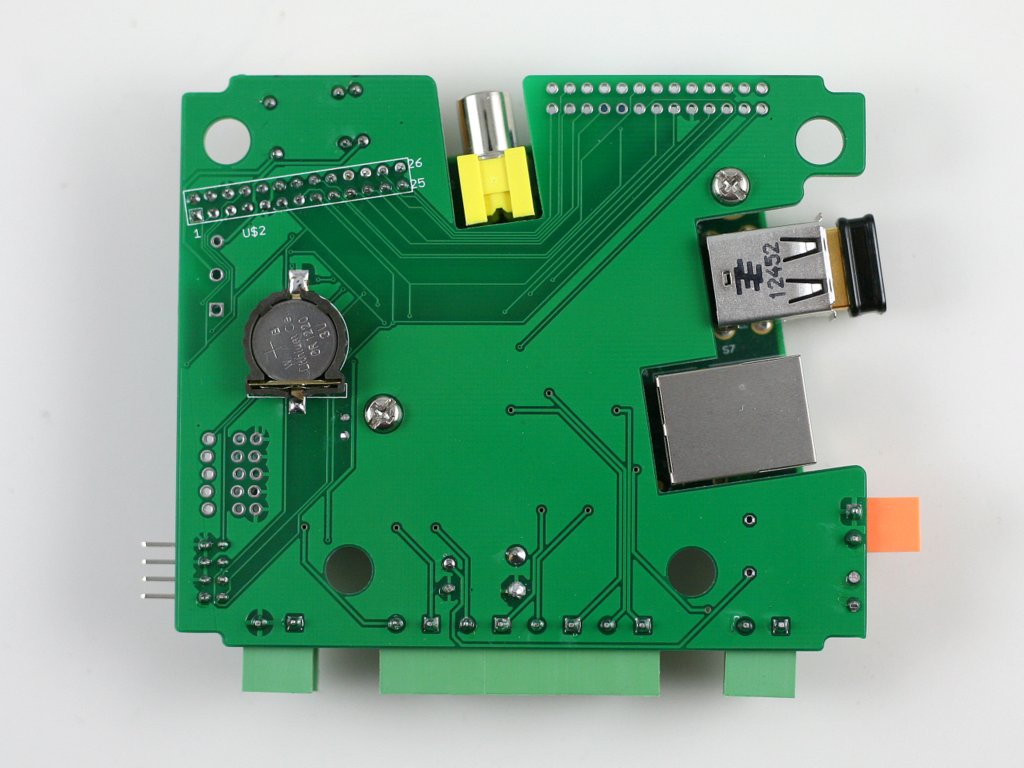
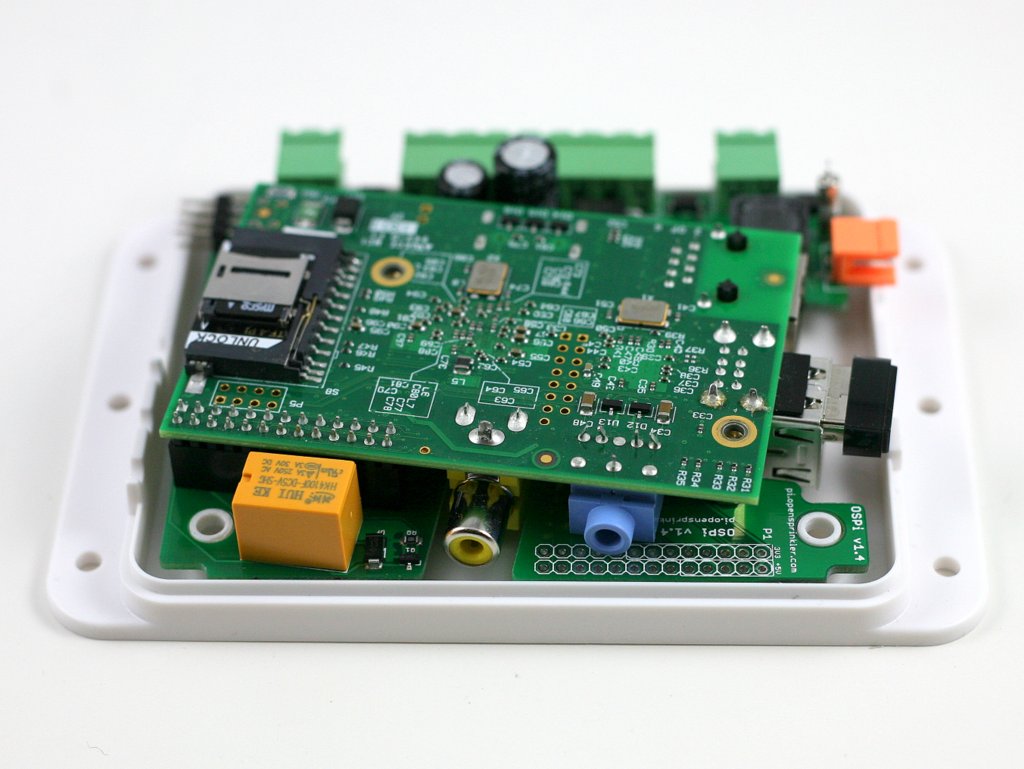
Next, because the injection-molded enclosure is not high enough, I cannot continue using the current design where the Pi faces up and connects to OSPi through ribbon cables. It’s necessary to flip the Pi and plug it into OSPi facing down. This will reduce the height of the overall assembly. However, there is one additional complication: the USB, Ethernet, and composite video connectors on the Pi are all quite tall, so it’s necessary to make cutouts on the OSPi PCB to allow these connectors to sink below the board. The picture on the left below shows the back of the PCB, and you can see where the connectors go through the board.

IMG_3134IMG_3120

As the Pi is now facing down, it’s not easy to access the GPIO pins directly. Therefore I’ve mapped out all the 2×13 pins on the Pi to the pinout area, seen at the top-left corner of the PCB.

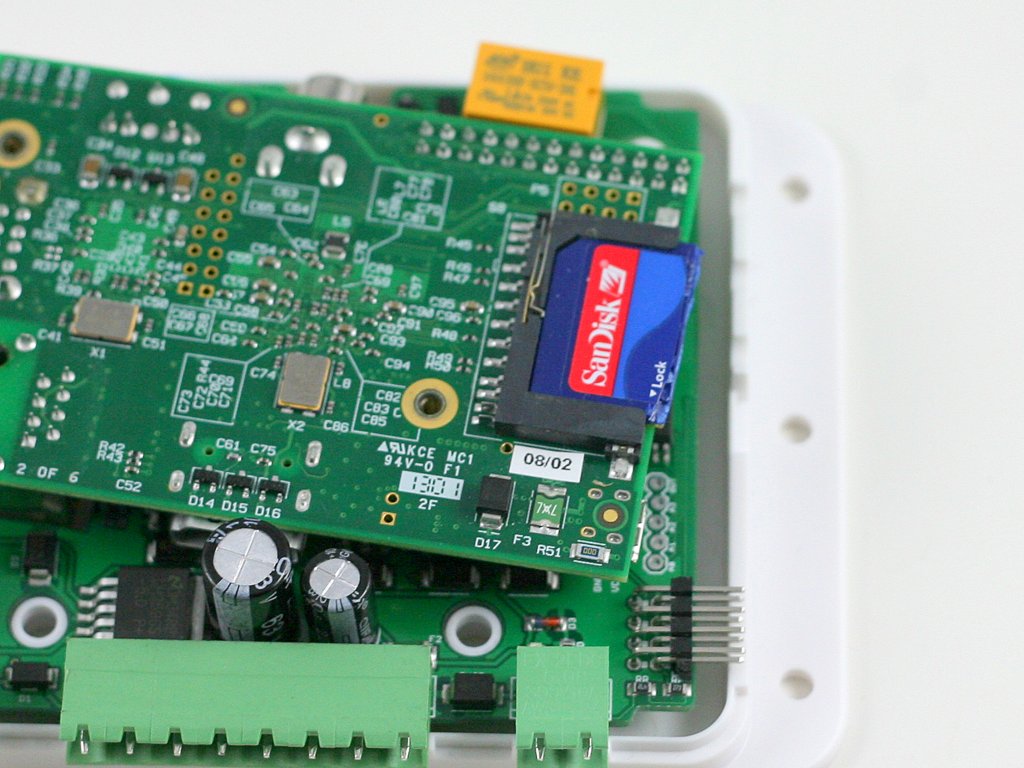
The last bit of the puzzle is the SD card. Since the enclosure has very limited space, it’s not possible to fit a full-size SD card, without making a cutout on the side. So we need a low-profile SD card. There are several options, one is this microSD to SD adapter. It’s basically a microSD card slot soldered onto a PCB shaped like an SD card but half the size. This and other similar adapters are readily available online and they work reasonably well.

IMG_3122IMG_3119

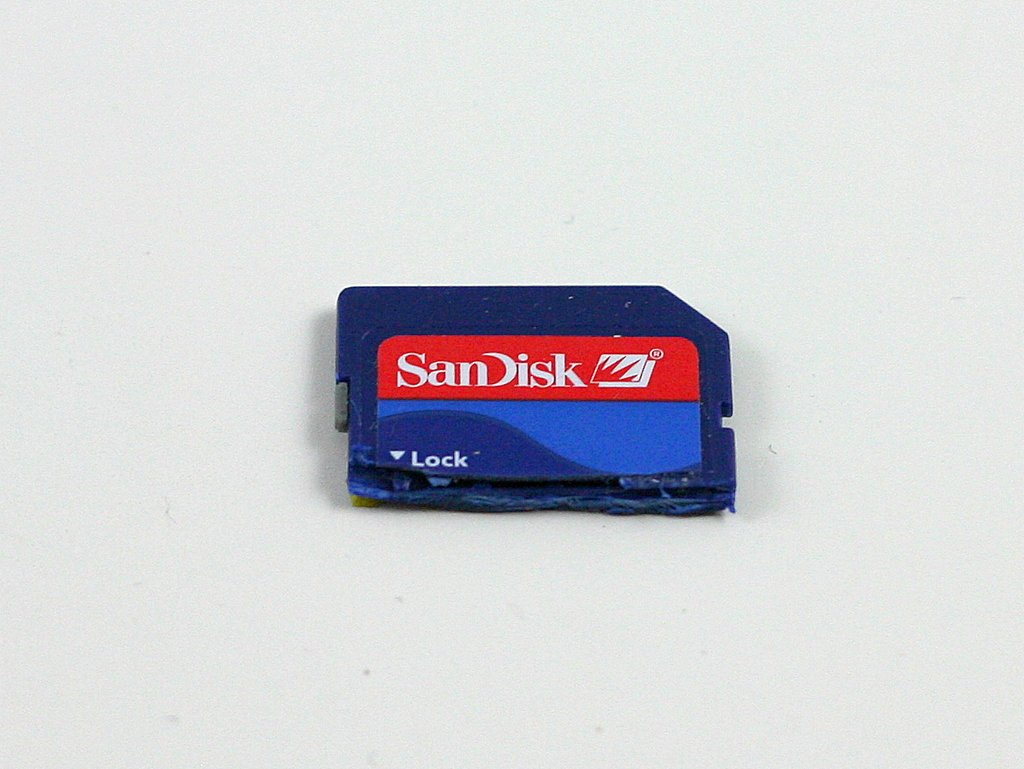
While Googling ‘low-profile SD card’, I found an surprising solution that’s dead simple. In case you don’t know this already: many full-size SD cards are actually half empty. What this means is that the useful stuff (namely the chip and connectors) only take half the space, while the other half has nothing in it! As a result, you can safely cut half of the card away, thus making a low-profile SD card without any adapter. This also has the advantage of preserving the high performance of a full-size SD card (while the microSD card is considerably slower). The downside though, is that if you ever need to insert the SD card to your computer’s SD card slot, you will have to tape the other half back, so that it extends to the original length. Otherwise it will be too short to push in and pop out.

IMG_3123IMG_3124

Anyways, this is the end of the story. I admit the new funky design feels a bit forced: it’s born out of the need to re-use the injection-molded enclosure, which wasn’t designed with OSPi in mind. But I am quite excited that I figured out all the pieces of the puzzle. Eventually I may pay a sizable chunk of money to order a new mold dedicated to OSPi, but before that happens we have to stick with the existing resources 🙂

The hardware components remain largely the same with version 1.3. The only difference is that the relay has been upgraded to a slightly bigger, 250V / 3A type. I am also considering adding a pin header for the nRF24L01 transceiver, to make it possible to communicate with our upcoming products such as OpenSprinkler Bee. Pending a few minor tweaks, things should be finalized within a month or two. Please leave your comments and suggestions, as this will be the last chance to influence the final design of 1.4. Thanks!
The past week has seen some nice community contributions to SquareWear 2.0. The first is a 3D printed strap-on case designed by Paul Modiano:

Very nice and makes SquareWear truly wearable 🙂 The add-on module in the picture is an ADXL335 accelerometer which takes analog pins A4, A2 and A3. The 3D files can be downloaded from Thingiverse. Thanks Paul for designing this case!

Next is an April fool’s day prank created by Steve Edwards. I don’t have a picture of it, but here is Steve’s description from the comments section:

Great platform for April Fools.

I wrote a sketch that ‘delays’ for 3 hours (to give you a chance to hide the Square and for the victim to fall asleep) and then runs 2 tasks:

1) Every x seconds, beep y tones, of z frequency where x, y, and z are random()ized.

2) Every hour blast out 30 random frequency tones to make sure the victim is awake.

Also, before each tone is played, I check to see if the light sensor is less than 2 so if the victim turns on the lights to look for it, it stops ‘beeping.’

I hid 3 in my son’s room. He didn’t think it was so funny 🙂

Sounds like a fun gadget to annoy someone 🙂

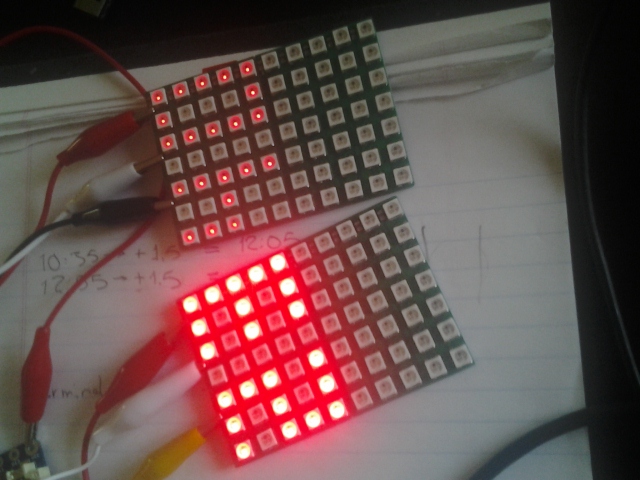
I also got an email from Pete Metcalfe who wrote a temperature display demo using SquareWear 2 and the chainable LED matrix. He made a compact display by creating a new, 3×5 pixel array of numbers. The source code is posted below.

sqrwear_tempdisplay

I am so glad to see SquareWear 2.0 being gradually picked up by the community, and the interesting applications created and shared by users. More to come later!


// Pete's temperature display demo
void loop(){
float temp = (float)analogRead(PINTEMP);
temp = (temp * 3.3 / 1024 - 0.5) / 0.01; // MCP9700.MCP9700A
clearStrip();
// define a 3x5 pixel array
int nums[10][13] = {
{ 0, 1, 2, 7, 9,14,16,21,23,28,29,30,30}, //0
{ 1, 8, 9,15,22,28,29,30,30,30,30,30,30}, //1
{ 0, 1, 2, 7,14,15,16,23,28,29,30,30,30}, //2
{ 0, 1, 2, 7,14,15,16,21,28,29,30,30,30}, //3
{ 0, 2, 7, 9,14,15,16,21,28,28,28,28,28}, //4
{ 0, 1, 2, 9,14,15,16,21,28,29,30,30,30}, //5
{ 2, 9,14,15,16,21,23,28,29,30,30,30,30}, //6
{ 0, 1, 2, 7,14,21,28,28,28,28,28,28,28}, //7
{ 0, 1, 2, 7, 9,14,15,16,21,23,28,29,30}, //8
{ 0, 1, 2, 7, 9,14,15,16,21,28,28,28,28} //9
};
int dig10 = int(temp/10);
int dig1 = temp - (dig10*10);
for(int i = 0; i < 13 ; i++){ strip.setPixelColor((nums[dig10][i]+4),0,0,255); } for(int i = 0; i < 13 ; i++){ strip.setPixelColor((nums[dig1][i]),0,0,255); } strip.show(); delay(2000); } void clearStrip(){ for(int i = 0; i < strip.numPixels(); i++){ strip.setPixelColor(i,0,0,0); } strip.show(); }

Update: check out our new standalone OpenSprinkler Bee (OSBee) 2.0 with built-in WiFi and OLED display.

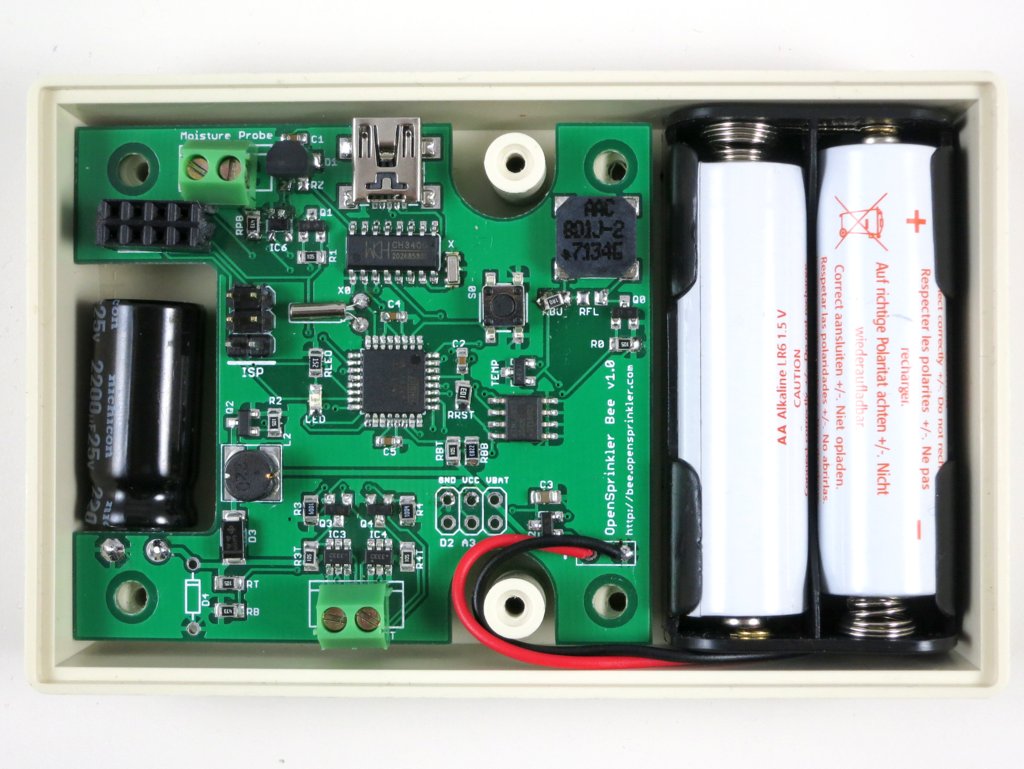
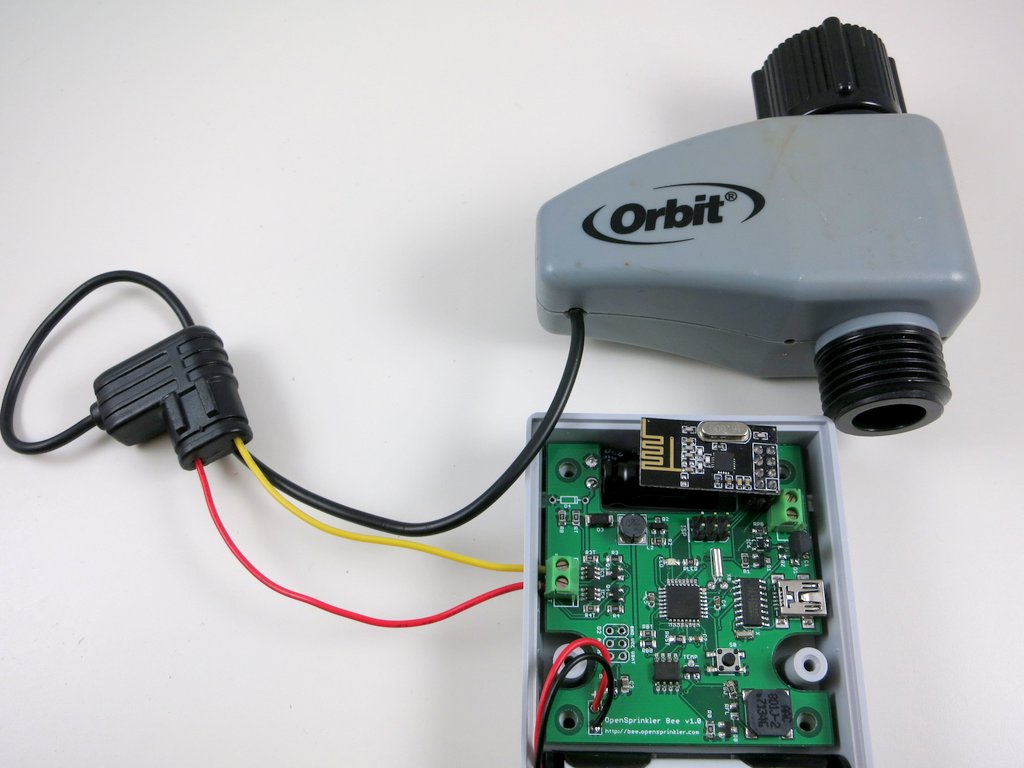
It has been a month since my last post. Apologies for being silent for a month. In the meantime a lot of new exciting projects are happening. Today I am going to show you the first prototype of OpenSprinkler Bee (OSBee) — a programmable sprinkler timer for battery-operated valves.

IMG_0008IMG_0012

Like the classic OpenSprinkler, OSBee is an open-source Arduino-based sprinkler timer. The main difference is that OSBee is designed to work with battery-operated sprinkler valves. It’s powered by two AA batteries. In contrast, the classic OpenSprinkler is powered by 24V AC wall adapters. Also, OSBee does not have built-in Ethernet interface, but it has a 2.4G RF transceiver (nRF24L01) and I am considering leaving spaces to add additional modules such as XBee and Bluetooth. This way OSBee can communicate with a base station or a smart phone, for creating web or smartphone-based user interface.

The name ‘Bee’ comes from the abbreviation Battery-Enabled Extension. It’s co-incidence that it sounded more like XBee. It may very well have an XBee slot in the end, but the name was not intended to imply XBee. Also, ‘Bee’ reminds me of the garden, and gardens need to be watered, so, there is the connection. Different from the classic OpenSprinkler, OSBee now comes with a water-proof enclosure, which means it can be left outdoors, such as in a garden, and will do its work diligently, like a Bee 🙂

IMG_0009IMG_0011

The history of OpenSprinkler Bee traces all the way back to my very first Arduino-based sprinkler timer project — the Minty Water Valve Controller. It is a wireless sprinkler timer that is small enough to fit inside a mint tin. That was summer 2010 and I was shopping for a sprinkler controller for my new installed lawn. I was starting to learn about Arduino and had this great inspiration to design and make my own sprinkler controller using an Arduino 🙂 There I made it, and I posted a video about it (see below).

It was soon spotted by Chris Anderson, currently the CEO of 3D Robotics. We then started collaborating on the OpenSprinkler project. After some market research, we figured out that most common household sprinkler systems (particularly underground sprinkler systems) use the 24V AC sprinkler valves. That’s why instead of focusing on battery-operated valves, we started designing the classic OpenSprinkler for 24V AC valves. But battery-operated sprinkler valves are also very useful — they are power-efficient, most of them can be hooked up with garden hoses so they are very mobile — you can move them anywhere you have watering need. So far forward four years to now, after releasing the classic OpenSprinkler and its variants OSPi and OSBo, I’ve finally decided to finish up what I started a long time ago, that is, the OSBee!

Technical Details

For the technical minded, here are some details about the prototype design:

  • ATmega328 microcontroller, classic Arduino stuff 🙂
  • Powered by two AA batteries, which are boosted to 3.3V VCC using Microchip’s MCP1640 (same design with first-generation AASaver). MCP1640 has a bypass mode, allowing it to turn off boosting when microcontroller is sleeping. This way it can maximally save power.
  • nRF24L01 2.4G RF transceiver. This is one of the most popular and lowest-cost RF transceivers. This chip has excellent operating voltage range (1.9V to 3.6V) and reasonable transmission range (up to a couple hundred meters?). It also has a version with amplification which can extend the transmission range to a kilometer!
  • SMT buzzer, push-button, 16KB EEPROM (borrowed from SquareWear 2,0 and Mini design)
  • PWM-driven boost converter with software defined boost voltage, and an H-bridge to drive sprinkler solenoid. This allows OSBee to interface with many types of valves at different operating voltages, such as 9V, 12V, 24V.
  • Soil moisture sensor using a capacitive soil moisture probe and a Schmidt trigger oscillator to measure capacitance. This will provide OSBee with the capability of soil moisture based control.
  • Serpac 121 enclosure with water-proof perimeter seal.

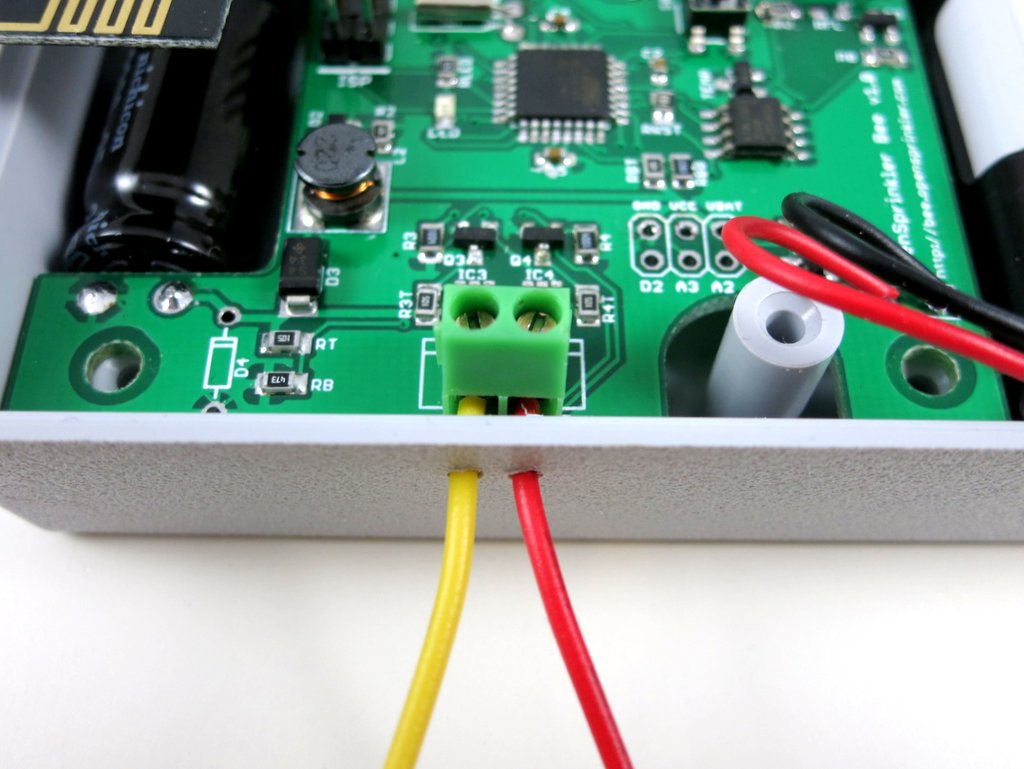
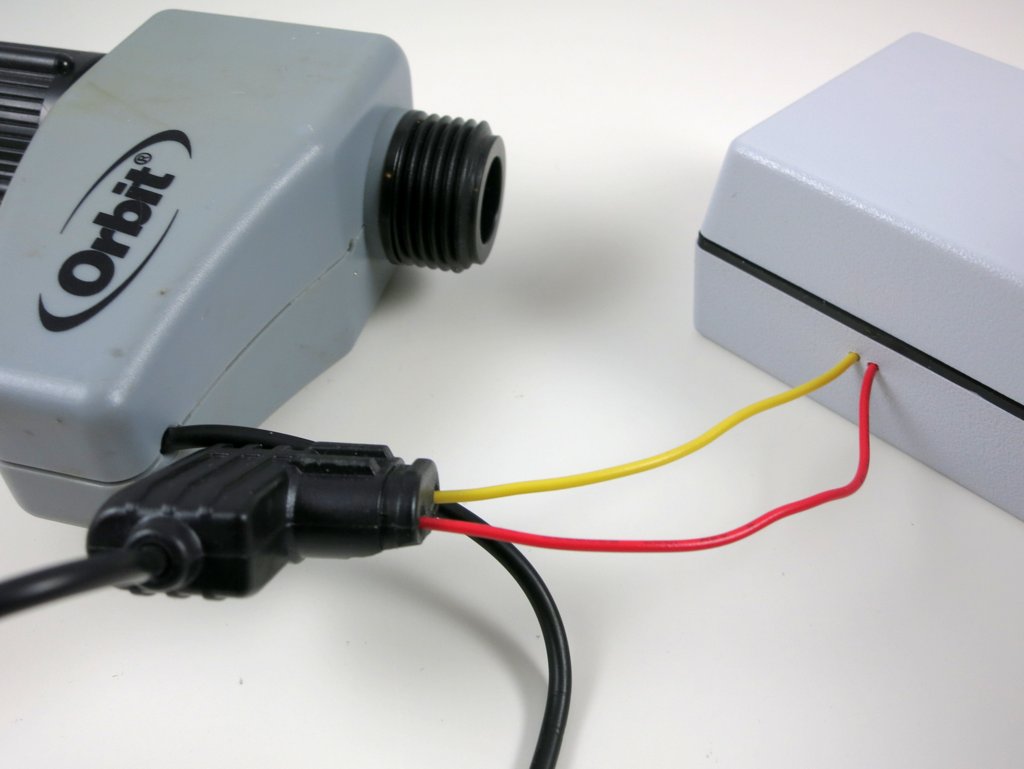
One tricky part with preserving the water-proof design is how to make the connection from the controller to the sprinkler valve. To lower the cost, I have to stick with off-the-shelf enclosures, which means minimal customization. The current solution I figured is to simply drill two small holes and insert two wires through the holes. Then you can seal the holes with some hot glue or water-proof spray. Not the most elegant solution, but simple.

Also, the choice of AA batteries (as opposed to rechargeable Lithium batteries) is due to the consideration that the controller may be left outdoor during hot summer days. In this case the temperature can potentially rise up to 60 degrees Celsius, which is very unhealthy to Lithium batteries.

IMG_0013IMG_0014

So there you go, the first prototype of OpenSprinkler Bee. I am in the process of finalizing the design. Comments and suggestions are much appreciated!

This is an official announcement of several recent OpenSprinkler updates: the fully assembled OpenSprinkler 2.1s, a new firmware revision 2.0.4, and a GUI-based firmware update tool.


First, the hardware:

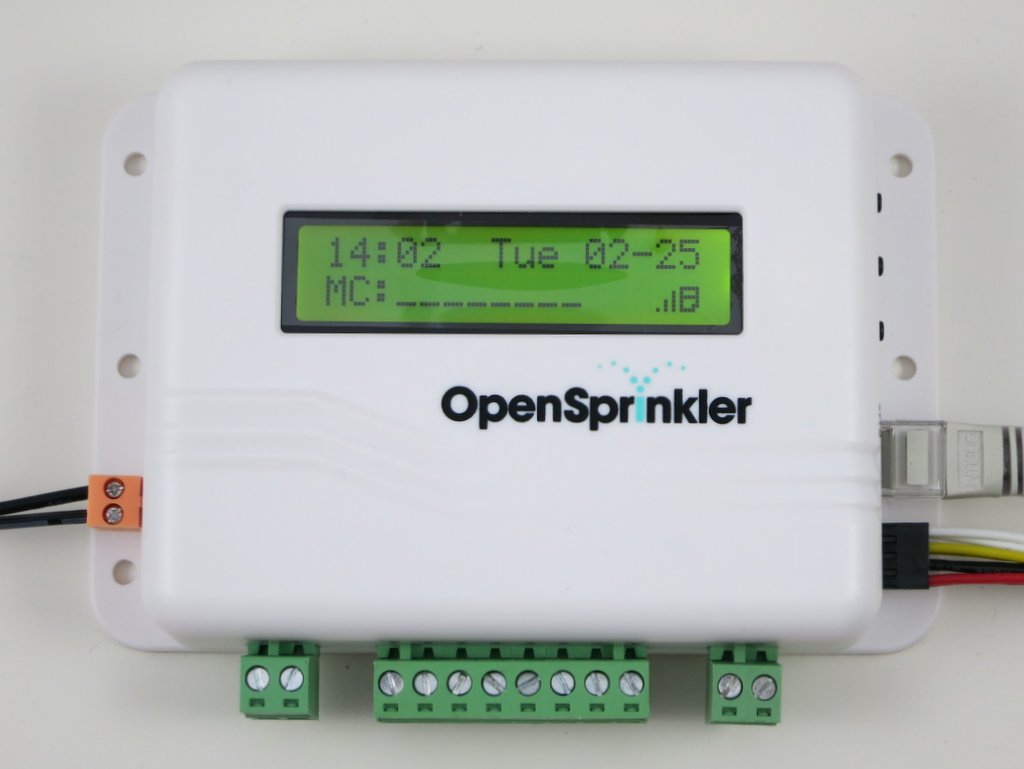
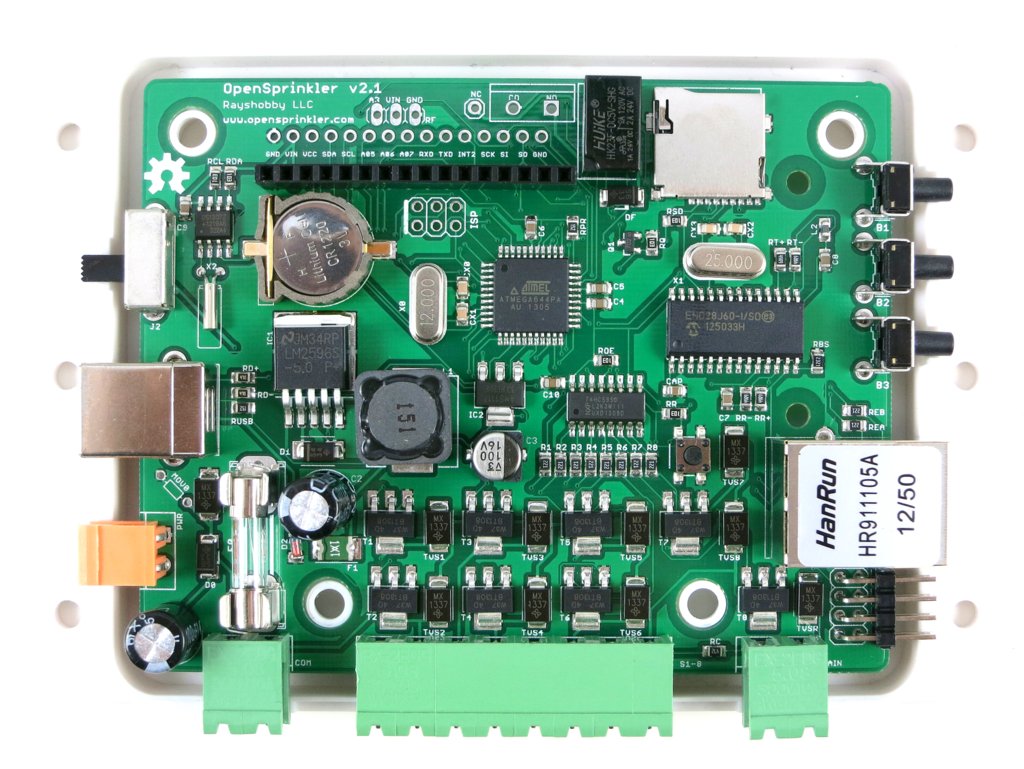
os21sIMG_3968

So what’s new in OpenSprinkler 2.1s? Here are the main updates:

  • ATmega644 mcu running at 12MHz with USBasp bootloader.
  • Added per-station transient voltage suppressor (TVS).
  • Added TVS and 2A fuse on the 24V AC line.
  • 24V AC terminal block is changed to orange-colored with 3.96mm spacing.
  • Added on-board 120V/2A mini-relay.

These pretty much follow the same updates we made in the DIY kit 2.1u. With these updates, it brings the fully assembled 2.1s to the same page, in terms of hardware features, with all other OpenSprinkler variants (e.g. OSPi, OSBo). OpenSprinkler v2.1s is now available for purchase at the Rayshobby Shop.


Next, the firmware 2.0.4:

This is a minor revision, but with important changes in preparation for Samer Albahra’s awesome new OpenSprinkler Mobile App. This new app is snappier and even more polished than the current version. It will have native apps on all mobile platforms. and it will also have cool new features such as language localization (yay!) and automatic discovery of OpenSprinkler devices. I am very grateful for Samer’s help and continued contributions to this project, and I’d also like to thank Balazs for contributing to the weather and the language localization features.

So technically what have changed in this firmware? Since I have never blogged about firmware 2.0.2 and 2.0.3, I ‘ve included the accumulated changes below:

  1. Added support for JSON and fixed several bugs.
  2. Added support to change Javascript URL.
  3. Stores controller operation enable bit, manual mode bit, rain delay time in EEPROM.
  4. More options are made editable through the web interface.
  5. Added support to change time manually (enabled when NTP sync is turned off).
  6. Added LCD auto-dimming feature (after 30 seconds of inactivity, the LCD brightness will lower down to the LCD Dimming value set in options).

About the first bullet, let me explain with more details. Support for JSON output has been added since firmware 2.0.2. This is very useful for integrating OpenSprinkler with mobile apps, external control programs, and jQuery and AJAX in the future. The specific JSON outputs are:

  • http://x.x.x.x/jo: returns options.
  • http://x.x.x.x/jc: returns controller variables.
  • http://x.x.x.x/jp: returns program data.
  • http://x.x.x.x/jn: returns station names and data.
  • http://x.x.x.x/js: returns station status bits.

where x.x.x.x is the OpenSprinkler’s IP address. Right now the JSON code co-exists with code that spits out HTML pages, so there is a considerable amount of redundancy. This will soon change and the code will be significantly simplified in the near future.

About the second bullet, the firmware now supports Javascript files stored anywhere, including on a microSD card inserted in the controller itself. These Javascript files are required to render the controller webpages. They are usually too big to store in the microcontroller internally, but can be stored on an external path. The default path is http://rayshobby.net/scripts/java/svc2.0.4. To change it, use http://x.x.x.x/su, where x.x.x.x is your OpenSprinkler’s IP address. To host the Javascript locally on the microSD card, copy the necessary Javascript files to a microSD card (2GB or less, formatted to FAT), and insert to OpenSprinkler. Then change the Javascript path to . (i.e. a dot), indicating the files are served locally. With these changes, the controller can be truly independent, without the need to reference the Internet. So you can access the controller even if your local network is not connected to the Internet.

Firmware 2.0.4 is compatible with OpenSprinkler 2nd generation (including 2.0s and 2.1s/u). The source code is available for download at the OpenSprinkler Github repository. Please note that 2.0 and 2.1 use different microcontroller frequencies (8MHz and 12MHz respectively), therefore the compiled firmware files are different for them. If you’d like to upgrade to this firmware, please read on.


Finally, the GUI-based Firmware Update Tool:

Update: the information below is outdated. Please check the new OpenSprinkler Firmware Updater 2.0.


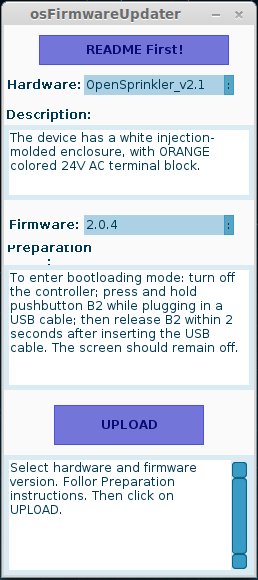
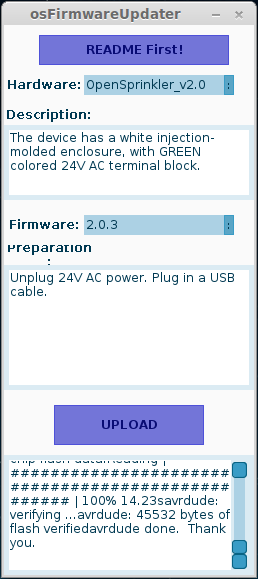
As OpenSprinkler has gone through many different hardware and firmware revisions, updating firmware has become more and more confusing. That’s why I’ve decided to make a GUI-based firmware update tool. This doesn’t completely get rid of the technical challenges, but it certainly makes the process less confusing 🙂

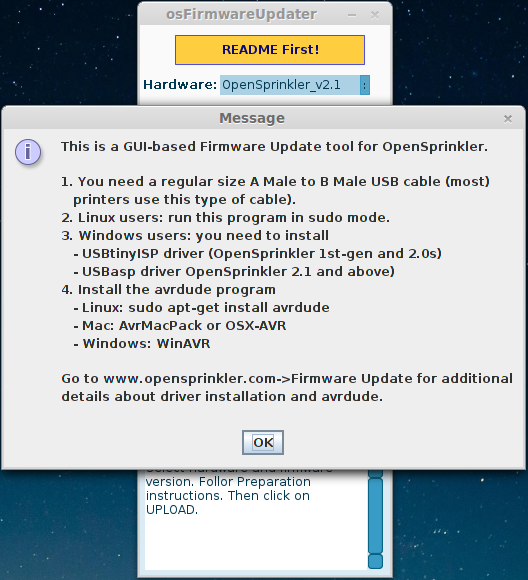
The updater is written in Processing, so it’s naturally cross-platform. The usage is pretty simple: you select your OpenSprinkler hardware version, and the updater provides a list of available firmwares. You select which firmware you want (defaults to the latest version), and click on Upload. That’s it. The GUI provides some basic descriptions of the hardware (in case you forget which hardware you have), and instructions to enter bootloading mode.

osFWUpdater_1osFWUpdater_2osFWUpdater_3

The firmware information is all stored in a file named os_firmware_info.txt. The avrdude program is packaged together with the tool so you do not need to install it separately (except in Linux, where you can easily install avrdude by sudo apt-get install avrdude).

There is one remaining piece, though — if you are a Windows user, you need to install USBtinyISP driver (for OpenSprinkler 1st-gen and OpenSprinkler 2.0) or USBasp driver (for OpenSprinkler 2.1u/s). Please refer to the Firmware Update instructions for additional details. This is probably the biggest technical hurdle and we are trying to find a more user-friendly solution. Basically, if you are using Windows XP, Vista, or 7 users, it’s not too bad; but if you are using Windows 8, it gets really messy — you need to disable driver enforcement before you can install the drivers. If you are lost, try to google ‘Windows 8 USBtinyISP’, or ‘Windows 8 USBasp’ and you should be able to find successful solutions.

If for the life of yours you simply cannot get the driver installed, you are resort to the Rayshobby pre-configured VirtualBox image — is creates a Virtual Linux in your host Windows OS, and passes the USB programmer directly to the Virtual OS, thus bypassing the Windows driver issue.

The Firmware Updater Tool can be downloaded following the links below:

Please run the ‘osFirmwareUpdater’ program in the folder that corresponds to your operating system.

Note: if you see messages such as avrdude: warning: cannot set sck period. Please check for usbasp firmware update., and avrdude: error: usbasp_transmit: usbasp_control_msg: sending control message failed, these are normal and can be safely ignored. These warnings / errors have to do with the behavior of the bootloader upon reset. They do NOT mean the firmware upload has failed.

Mac Users: if you encounter an error Application is damaged and can’t be opened, you need to temporarily change a Security and Privacy setting in System Preferences. See the details in this work-around.

This is a first step towards making the update process more user friendly. Comments and suggestions are welcome!


« Newer Posts - Older Posts »