USBtiny Programmer Build Instructions
The USBtiny programmer is based on an existing undocumented OpenSprinkler v1.2 circuit board. It consists of only a few components and can be used to program any ATmega328 microcontroller.
Note: below all images below are clickable, in order for you to see the full-resolution details.
Build it
|
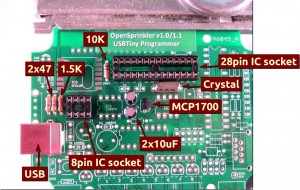
Insert all components. These include:
- IC sockets: 8-pin (ATtiny45), and 28-pin (ATmega328).
- Resistors: 10K (RRST), two 47 ohm (RD+/RD-), one 1.5K (R7).
- Capacitors: two 10uF (C2/C3).
- USB connector, MCP1700 regulator, and 8MHz crystal (X1).
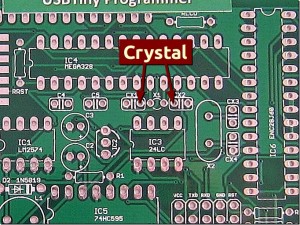
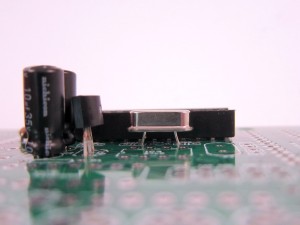
Click the image on the upper-left to see where they are located. In particular, the 8MHz crystal should be inserted to the holes shown in the left image. Since the spacing of the two holes is slightly larger than the crystal pins, do not insert the crystal all the way to the bottom. Instead, push it down as much as you can, without inserting much force. The lower-left image shows an example.
Also pay attention to the polarity of the capacitors: the longer lead should go into the hole marked ‘+’.
|
|
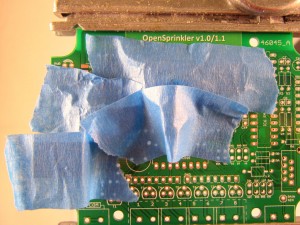
To solder, I typically use painter’s tape to fix the components to the PCB, then flip the board and solder all joints in one pass. Then use a diagonal cutter to clip the leads.
|
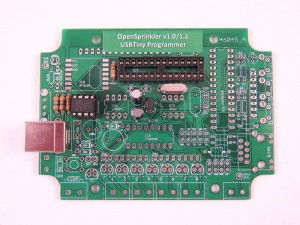
|
After all components are soldered, insert the pre-programmed ATtiny45 microcontroller, and you are all set!
|
Use it
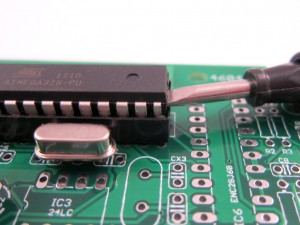 In order to use the programmer, you need to take out the ATmega328 microcontroller from your existing OpenSprinkler board, and insert it to the 28pin socket on the programmer.
Important: when taking out the microcontroller, use a small screw driver to carefully lift it up from both sides. DO NOT pull it out directly using your hand — that will almost certainly destroy some pins.
Next, follow the Re-programming Instructions to upload a new firmware. After you are done, take out the microcontroller and plug it back into your OpenSprinkler board. That’s it.
 In order to use the programmer, you need to take out the ATmega328 microcontroller from your existing OpenSprinkler board, and insert it to the 28pin socket on the programmer.


